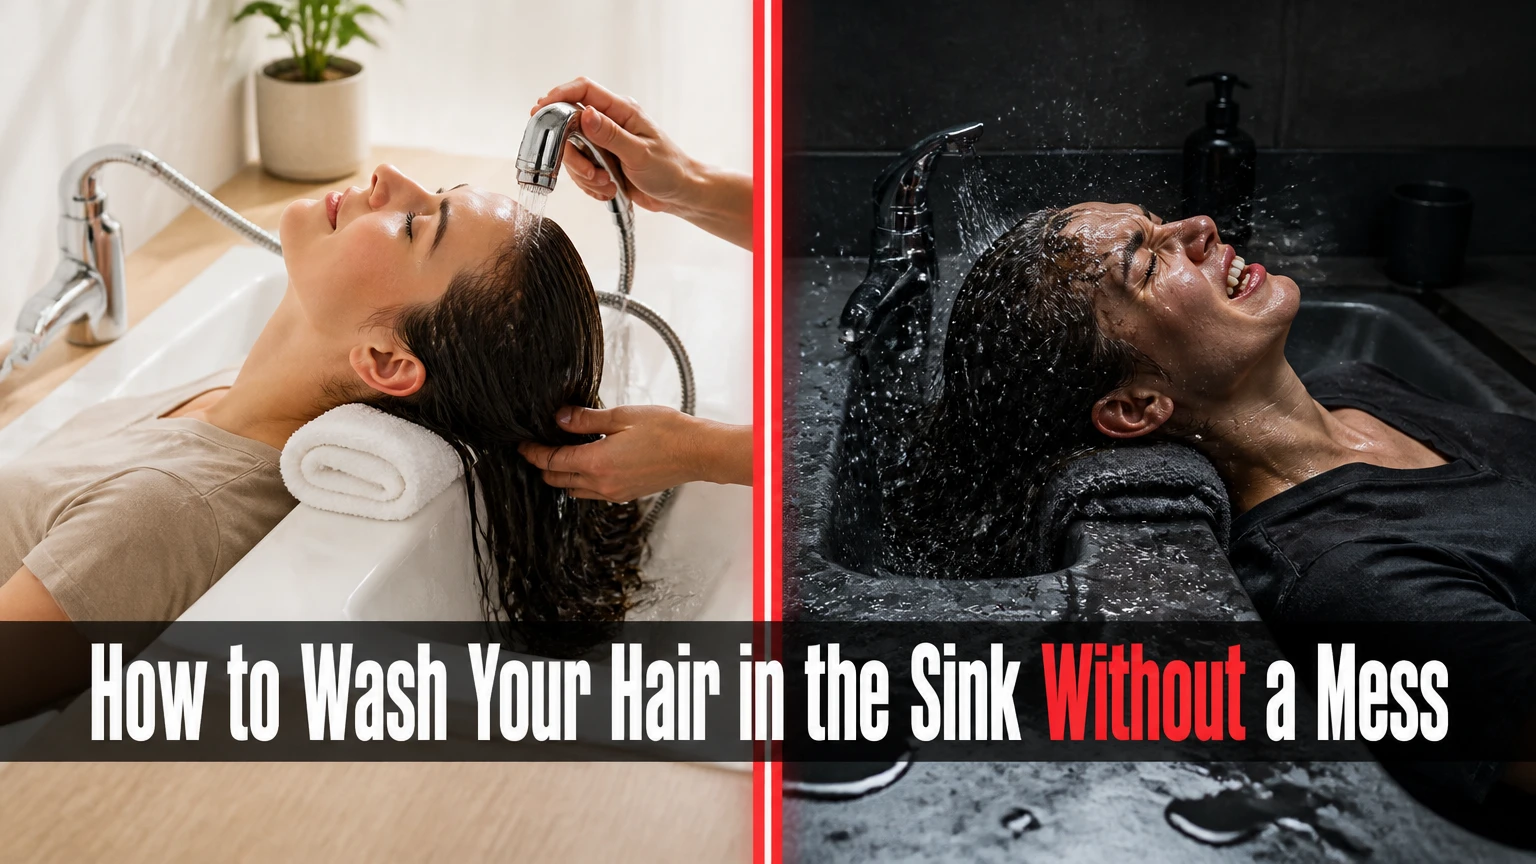
Washing your hair in the sink means wetting, shampooing, conditioning, and rinsing the hair over a bathroom or kitchen basin instead of under a shower. The safest home method takes about 5-15 minutes, uses lukewarm water, and works best when the sink supports your neck or lets you sit upright.
Key facts at a glance
A typical sink wash takes 5-15 minutes, including setup and cleanup.
Lukewarm water is safer for the scalp than very hot faucet water.
Shampoo belongs mainly on the scalp, while conditioner usually belongs on the mid-lengths and ends.
A cup works without special equipment, but a faucet hose reduces effort and improves rinsing control.
Long or dense hair should be divided into 2-4 sections so water reaches the scalp.
Sink washing is useful for targeted cleaning, but prolonged forward bending can strain the neck and lower back.
How Does Sink Hair Washing Work?
Sink hair washing uses a basin, faucet, cup, or flexible spray hose to deliver water to the scalp while the rest of the body stays dressed and dry. The hair can hang forward over the drain, rest backward over the basin, or be washed upright with assistance.
The forward-bend method is the simplest arrangement because gravity carries water toward the drain. The backward method feels more like a salon shampoo, but it requires a deep basin, a padded edge, or a portable shampoo tray. A seated side wash is usually safer for someone who cannot bend or rotate the neck comfortably.
The method is practical for washing bangs, fringes, extensions, wigs, post-workout hair, and hair between full showers. It is less suitable when the basin is shallow, the faucet cannot reach the head, or the user cannot maintain a stable posture.
Which sink is suitable?
A sink should provide enough basin depth for the head, a stable standing or seated position, and a drain that can handle loose hair. A bathroom basin is usually more hygienic for personal washing, while a kitchen sink offers more space but requires careful cleaning before and after use.
| Sink type | Useful basin dimensions | Best position | Main limitation |
|---|---|---|---|
| Deep bathroom basin | 15-20 cm depth | Forward bend | Limited elbow room |
| Double kitchen sink | 20-25 cm depth | Forward bend or side wash | Food-contact cleaning required |
| Laundry or utility sink | 25-35 cm depth | Forward bend | Counter height may strain the back |
| Portable shampoo tray | 30-45 cm neck opening | Seated, face up | Typical cost of $15-$35 |
Avoid a basin with a sharp rim, unstable pedestal, exposed cleaning chemicals, or a faucet that forces the neck into a sharply angled position. A sink that feels manageable when dry may become hazardous once the floor and counter are wet.
What Should You Prepare Before Washing?
Prepare the sink, hair products, water-control tools, towel, and posture support before turning on the faucet. The minimum setup is shampoo, conditioner, one absorbent towel, a cup, and a clean drain strainer; a hose attachment is optional.
Before You Start
| Item | Typical quantity or specification | Purpose |
|---|---|---|
| Shampoo | 5-10 mL per wash | Cleans scalp oils and product residue |
| Conditioner | 5-15 mL per wash | Reduces friction on lengths |
| Microfiber towel | 1 towel, 60 x 100 cm | Removes water with less rubbing |
| Plastic cup | 250-500 mL capacity | Directs water without a sprayer |
| Drain catcher | 1 removable mesh insert | Collects shed hair |
| Neck support | 1 padded roll, 5-10 cm thick | Reduces pressure on the basin edge |
Typical preparation takes 2-4 minutes. Remove toothbrushes, soap dishes, cosmetics, food, and electrical appliances from the splash zone. Wipe the basin with a suitable household cleaner, then rinse away all cleaner before putting hair or skin near the surface.
Detangle dry hair gently from the ends upward. The American Academy of Dermatology recommends handling wet hair carefully because wet strands are more vulnerable to breakage, especially when brushed aggressively. Do not force a brush through a compact knot; loosen it with fingers or a wide-tooth comb.
Test the water on the inside of your wrist before placing your scalp under the faucet. Set a towel on the floor and a second towel across the counter lip if splashing is likely. If you have neck, back, shoulder, balance, or recent surgical restrictions, choose the seated method and arrange help before starting.
Which Sink-Washing Position Should You Use?
The forward-bend position is the easiest option for most independent users, the backward position offers the most salon-like rinse, and the seated side wash creates the lowest demand on balance. Position should be chosen by neck comfort, faucet reach, and ability to stand safely, not by hair length alone.
| Method | Typical duration | Equipment | Best fit | Main physical demand |
|---|---|---|---|---|
| Forward bend, face down | 5-10 minutes | Cup or hose | Independent adults | Neck and lower-back flexion |
| Backward lean, face up | 8-15 minutes | Deep basin and neck pad | Salon-style washing | Neck extension |
| Seated side wash | 10-20 minutes | Chair and long hose | Limited mobility | Helper coordination |
| Sectioned cup wash | 10-20 minutes | 250-500 mL cup | No sprayer available | Repeated pouring |
Forward-bend method
Stand close to the sink with feet about shoulder-width apart. Bend from the hips rather than rounding the spine, lower the head toward the basin, and keep the face pointed toward the drain.
The head should not hang unsupported for the entire wash. Pause between wetting, shampooing, and rinsing if the neck feels tired. A stool can reduce leg fatigue, but it does not automatically solve a sharply flexed neck.
Backward-lean method
Sit or stand with the back of the head supported over the basin and the neck resting on a padded edge. Keep the faucet stream directed at the hair rather than the face, and use a tray if the basin rim is too narrow.
Never place the full weight of the neck on a hard porcelain edge. A folded towel is better than bare ceramic, but a purpose-made shampoo tray gives more consistent support and directs runoff into the basin.
Seated side wash
Sit beside or in front of the sink while a helper controls the hose or cup. The helper should ask before changing water temperature or pressure, because the person receiving the wash may not see or reach the faucet.
A seated wash is often the most practical choice after an injury, during pregnancy when bending is uncomfortable, or for someone with reduced balance. Medical restrictions take priority: after neck or back surgery, follow the treating clinician’s washing instructions rather than relying on a general method.
How to Wash Your Hair in the Sink Step by Step
A complete sink wash has eight stages: protect the area, set the water, saturate the hair, shampoo the scalp, rinse, condition the lengths, rinse again, and dry gently. The most important success factor is complete saturation and rinsing at the nape, crown, and dense inner layers.
Step 1: Protect the sink and your posture
Place the drain catcher in the plughole, put a towel on the floor, and position products on the side opposite the faucet. Stand or sit close enough that the head does not need to reach far into the basin.
Keep both feet stable and move the body closer instead of extending the neck toward the water. If the faucet has a pull-out spray head, test its range before wetting the hair.
You will know it worked when: the faucet, products, towel, and drain are reachable without twisting.
Common mistake: starting with the head far from the basin, which increases splashing and back strain.
Step 2: Set lukewarm water
Run the faucet until the temperature is even, then test it on the wrist. Use low to moderate pressure, particularly with a narrow bathroom faucet that can spray sharply against the scalp.
Very hot water can irritate the scalp and worsen dryness for some people. The American Academy of Dermatology generally recommends warm rather than hot water for bathing and hair washing because excessive heat can contribute to dry skin.
You will know it worked when: the water feels comfortably warm on the wrist and does not sting the scalp.
Common mistake: testing only the first few seconds of water, before the temperature stabilizes.
Step 3: Saturate the hair completely
Wet the roots first, then work through the mid-lengths and ends. Move the head or hose so water reaches the temples, crown, behind the ears, nape, and the hair underneath the top layer.
Long or thick hair may require 2-4 sections. Lift one section at a time and direct water underneath it rather than relying on water flowing over the surface.
You will know it worked when: the hair feels uniformly heavy and water reaches the scalp beneath the densest area.
Common mistake: applying shampoo to partially dry hair, which causes uneven distribution and encourages excessive product use.
Step 4: Apply shampoo to the scalp
Use about 5-10 mL of shampoo for short or medium hair, then increase only if the scalp remains uncovered. Rub the product between wet palms and place it on the scalp in several points rather than concentrating it at the hairline.
Massage with the pads of the fingers for about 60-120 seconds. Avoid scratching with fingernails and avoid piling long hair on top of the head, because circular scrubbing can create tangles.
Shampoo primarily removes oil, sweat, dead skin, styling products, and environmental residue from the scalp. The lather that travels down the lengths usually provides enough cleansing for those strands.
You will know it worked when: the scalp feels evenly cleansed and the shampoo has reached the crown, temples, and nape.
Common mistake: using a quarter-sized amount automatically. The correct amount depends on scalp oil, hair density, product buildup, and shampoo concentration.
Step 5: Rinse from the scalp downward
Rinse until the water runs clear and the hair no longer feels slippery from shampoo. Direct the stream to the crown first, then the sides, behind the ears, and nape, allowing runoff to move toward the ends.
Use your free hand to separate dense hair. The nape is commonly missed during a sink rinse because the faucet angle and forward bend restrict access.
You will know it worked when: no foam remains at the nape, hairline, or underneath the top layer.
Common mistake: rinsing only the outer surface. Lift sections and check the scalp with your fingertips.
Step 6: Condition the lengths
Squeeze excess water from the hair with your hands, then apply conditioner from the mid-lengths to the ends. Keep heavy conditioner away from the scalp unless the product label specifically identifies it as a scalp conditioner.
Leave the product on for the label’s stated time, commonly 1-5 minutes. Use this pause to straighten your posture rather than remaining bent over the sink.
You will know it worked when: the lengths feel coated and strands slide past one another without force.
Common mistake: applying conditioner to dripping-wet hair, which dilutes the product and increases runoff.
Step 7: Rinse thoroughly
Rinse conditioner with lukewarm water until the lengths feel smooth but not coated. Cooler water is optional; it does not permanently “seal” the cuticle or repair damage, although a cooler final rinse may feel more comfortable on an irritated scalp.
The cuticle is the hair’s outer protective layer, and its condition depends more on hair chemistry, friction, heat, and product formulation than on a brief change in rinse temperature.
You will know it worked when: the hair feels clean, flexible, and free from a heavy film.
Common mistake: leaving conditioner at the roots, which can make fine hair look flat or oily.
Step 8: Squeeze, wrap, and clean
Press water from the hair with both hands before lifting the head. Wrap the hair in a microfiber towel or cotton T-shirt, then press rather than twist.
Dry the basin, counter, faucet, and floor. Remove shed hair from the drain catcher and rinse any remaining product from the basin.
You will know it worked when: the floor is dry, the drain is clear, and the hair is wrapped without tight tension.
Common mistake: rubbing wet hair vigorously with a thick bath towel. Friction increases frizz and can worsen breakage.
How Do You Wash Hair Without a Faucet Sprayer?
A 250-500 mL plastic cup can replace a detachable faucet hose, although rinsing takes longer and requires more controlled pouring. Fill the cup halfway, pour over one scalp section, and repeat until water reaches the skin beneath that section.
A cup gives better temperature control than placing the head directly under a fixed stream. It also works in shallow sinks where a spray attachment cannot reach the nape.
Use a second container to catch water only if the sink cannot drain normally. Do not use a container that previously held cleaning chemicals, food residue, or solvents.
How Much Time, Water, and Money Does Sink Washing Use?
A typical sink wash takes 5-15 minutes and uses approximately 2-5 gallons when the faucet runs only for wetting and rinsing. Actual consumption depends on faucet flow rate, rinse duration, hair density, and whether water is left running between steps.
A standard faucet commonly delivers about 1.5-2.2 gallons per minute, but older or low-flow fixtures vary. At 1.5 gallons per minute, five minutes of continuous flow equals 7.5 gallons, so the lower water range requires turning the faucet off during shampooing and conditioning.
| Setup | Typical purchase cost | Setup time | Typical water use |
|---|---|---|---|
| Existing faucet and cup | $0-$8 | 2-4 minutes | 2-5 gallons |
| Slip-on hose extension | $10-$25 | 5-15 minutes | 2-5 gallons |
| Silicone neck cushion | $12-$20 | 1-2 minutes | 2-5 gallons |
| Portable shampoo tray | $15-$35 | 5-10 minutes | 3-7 gallons |
These figures are practical household ranges, not universal measurements. A low-flow faucet, a short wash, and an efficient sectioning technique reduce water use more reliably than a special basin accessory.
Is Sink Washing Better Than Shower Washing?
Sink washing is better for targeted, fast hair cleaning and for people who want to avoid undressing, while shower washing is usually better for comfort, long hair, and full-body rinsing. The deciding factors are posture, hair density, basin design, and whether another person must assist.
| Decision factor | Sink wash | Shower wash | Practical consequence |
|---|---|---|---|
| Hair-only cleaning | 5-15 minutes | 10-20 minutes | Sink avoids a full-body wash |
| Water control | 2-5 gallons typical | 10-25 gallons typical | Sink can reduce running time |
| Neck posture | 30-90 degrees flexion or extension | Upright | Sink may increase strain |
| Long-hair rinsing | 2-4 sections often needed | Whole head under spray | Shower is easier for dense hair |
| Clothing | Remains on | Usually removed | Sink is useful between showers |
| Splash containment | Basin and counter | Enclosed shower | Shower creates less surrounding mess |
The United States Environmental Protection Agency identifies WaterSense-labeled showerheads as using no more than 2.0 gallons per minute, compared with the federal maximum of 2.5 gallons per minute for standard showerheads. That comparison means a short, controlled sink wash may use less water, but a continuously running sink faucet can eliminate the advantage.
Sink washing is not a universal replacement for showering. People with severe back pain may find prolonged bending worse than standing, and people with very long hair may need a shower or professional wash basin for easier saturation and rinsing.
What Changes for Different Hair Types?
Hair type changes the washing technique mainly through density, curl pattern, porosity, extensions, and product buildup. The core process remains the same, but sectioning, detangling, conditioner placement, and rinse time need adjustment.
| Hair situation | Section count | Detangling approach | Rinse adjustment |
|---|---|---|---|
| Short, fine hair | 1 section | Fingers or soft brush | 30-60 seconds |
| Long, straight hair | 2 sections | Ends upward before washing | 1-2 minutes |
| Thick or coarse hair | 3-4 sections | Wide-tooth comb, dry first | 2-4 minutes |
| Curly or coily hair | 4-8 small sections | Fingers with conditioner | Low pressure, section by section |
| Extensions or braids | 4-8 sections | Do not pull attachment points | Dry roots thoroughly |
Curly, coily, or textured hair
Use lower water pressure and separate the hair into manageable sections. Apply shampoo to the scalp between sections, then let diluted lather travel through the lengths rather than scrubbing the curl pattern together.
Conditioner can remain on longer if the product label permits it. Detangle with fingers or a wide-tooth comb while conditioner provides slip, beginning at the ends.
Long or thick hair
Never assume the surface is wet because the outside feels saturated. Lift each section and direct water to the inner layer, especially at the crown and nape.
A second shampoo application may be reasonable after heavy styling-product buildup, but use less product for the second pass. Excess shampoo does not compensate for inadequate sectioning.
Dyed, chemically treated, or dry hair
Use the product routine recommended for the treatment and avoid very hot water. Keep shampoo concentrated on the scalp, reduce aggressive rubbing, and use a conditioner formulated for the hair’s condition.
A sink wash cannot restore chemically damaged keratin. It can reduce additional mechanical stress when the hair is handled gently.
What Are the Most Common Sink-Washing Problems?
The most common failures are incomplete rinsing, excessive bending, uncontrolled splashing, tangling, and clogged drains. Each problem usually comes from a mismatch between the sink setup and the user’s hair density or physical range of motion.
| Problem | Likely cause | Immediate fix | Prevention |
|---|---|---|---|
| Shampoo remains at nape | Faucet misses rear scalp | Lift nape and rinse 30 seconds | Check scalp by touch |
| Water splashes onto floor | High pressure or distant head | Lower pressure and move closer | Place towel at counter edge |
| Hair tangles upside down | Hair piled during scrubbing | Add conditioner and separate gently | Shampoo scalp in straight motions |
| Neck pain develops | Excessive flexion or extension | Stop and switch position | Use stool or neck support |
| Drain empties slowly | Shed hair and product | Remove catcher and clear hair | Use a mesh drain insert |
How do you prevent tangling?
Keep hair hanging in its natural direction and smooth shampoo over the scalp with the fingertips. Do not twist, bunch, or rub long hair into a ball while washing.
For curly or textured hair, work in sections and avoid repeated manipulation after the hair is saturated. If tangling begins, stop shampooing, add conditioner to the affected area, and separate the strands from the ends upward.
How do you reduce neck and back strain?
Bring the torso and feet closer to the basin, bend from the hips, and limit each bent interval to roughly 1-3 minutes. A seated side wash is preferable when standing balance or spinal comfort is poor.
Pain, numbness, dizziness, or weakness is a stop signal, not a technique problem. Ask another person to help or use a professional basin if changing posture does not resolve the symptoms.
How do you manage hard water or product buildup?
Hard water can leave mineral deposits that make hair feel dull, rough, or coated, although those symptoms also have many other causes. A clarifying shampoo or chelating product may help occasionally, but frequent use can dry the hair.
Rinse longer when using oils, waxes, dry shampoo, gels, or silicone-heavy products. Product labels and a stylist’s assessment are more reliable than adding repeated shampoo passes automatically.
Can You Wash Hair in a Kitchen Sink?
You can wash hair in a kitchen sink if the basin, faucet, and surrounding area are suitable, but the sink must be cleaned before and after use. Remove food, dishes, sponges, and cleaning products, then rinse away all cleaner before placing hair or skin near the basin.
A kitchen sink often provides more depth and elbow room than a small bathroom basin. Its disadvantages include food-safety concerns, a harder counter edge, and greater cleanup requirements.
Use a removable drain catcher and do not push shed hair into the garbage disposal. Hair can wrap around moving components or combine with grease and food residue to restrict drainage.
What Are the Alternatives to a Sink Wash?
A shower, bathtub, portable shampoo tray, professional salon basin, or no-rinse product can replace a conventional sink wash. The best alternative depends on whether the priority is mobility, water control, full cleansing, or avoiding water altogether.
| Alternative | Typical cost | Typical duration | Best use case |
|---|---|---|---|
| Shower with handheld head | $25-$150 fixture cost | 10-20 minutes | Long or dense hair |
| Bathtub edge wash | $0 existing equipment | 10-20 minutes | Low faucet reach |
| Portable shampoo tray | $15-$35 | 10-20 minutes | Seated assisted washing |
| Salon shampoo basin | $25-$60 service | 15-30 minutes | Restricted mobility or styling |
| No-rinse foam | $5-$15 product | 5-10 minutes | Temporary partial cleaning |
No-rinse foam is an emergency or partial-cleaning option, not a full substitute for removing oil, sweat, or heavy styling residue with water. A handheld showerhead is usually the most comfortable upgrade for people who need frequent hair washing.
Which Safety Rules Matter Most?
Keep water lukewarm, secure your footing, protect the neck from hard edges, and stop when pain or dizziness appears. Never combine sink hair washing with an unstable chair, loose electrical cords, or inaccessible controls.
Children should not wash independently near a running faucet because temperature and drowning risks require adult supervision. People with recent surgery, severe balance limitations, open scalp wounds, or medical restrictions should follow clinician-specific instructions.
Do not place hair near a faucet aerator or detachable attachment that has visible grime or mineral buildup. Clean the attachment according to the manufacturer’s instructions, and replace cracked rubber washers that can cause sudden leaks.
Frequently Asked Questions
Can I wash my hair in a small bathroom sink?
Yes, if the faucet reaches the scalp and the basin has enough depth to catch runoff. Use a cup or low-pressure spray, place a towel over the counter edge, and wash in one or two sections. A small sink is less suitable for very long hair because saturation and rinsing become difficult.
Should I wash my hair upside down?
You can wash hair upside down when the forward bend does not cause neck pain, dizziness, or back discomfort. Keep the head near the drain, avoid piling hair on top of the scalp, and limit the bent position to short intervals. Upright or assisted washing is safer for people with restricted mobility.
How often can I wash hair in a sink?
You can wash hair in a sink as often as you would wash it in a shower, because the basin location does not determine hair-washing frequency. Frequency depends on scalp oil, sweat, styling products, hair texture, and medical advice. Use the mildest effective routine and follow product instructions.
Can I wash only my bangs or fringe in a sink?
Yes. Wet the fringe with a cup or low-pressure faucet, apply a small amount of shampoo to the roots, rinse toward the drain, and dry with a towel. A partial wash usually takes 2-5 minutes and avoids exposing the rest of the hairstyle to unnecessary water.
How do I wash a wig in a sink?
Fill a clean basin with cool or lukewarm water, follow the wig manufacturer’s instructions, and support the wig rather than scrubbing or twisting it. Human-hair wigs and synthetic wigs require different products and heat limits. Rinse in the direction of the fibers, then air-dry on a suitable stand.
Can I wash my hair after back or neck surgery?
Only follow the movement and bathing instructions provided by the surgeon or physical therapist. Sink washing often requires neck flexion, neck extension, or assisted transfers, so it may be inappropriate during early recovery. A seated professional wash or clinician-approved setup may reduce risk, but it is not automatically safe.
The Bottom Line
Washing your hair in the sink is a fast, targeted routine that usually takes 5-15 minutes and requires only shampoo, conditioner, a towel, and a cup or faucet hose. Use lukewarm water, support your posture, saturate every scalp section, shampoo the scalp, condition the lengths, and rinse the nape carefully. Choose a seated or assisted method when bending causes pain, dizziness, or instability.


