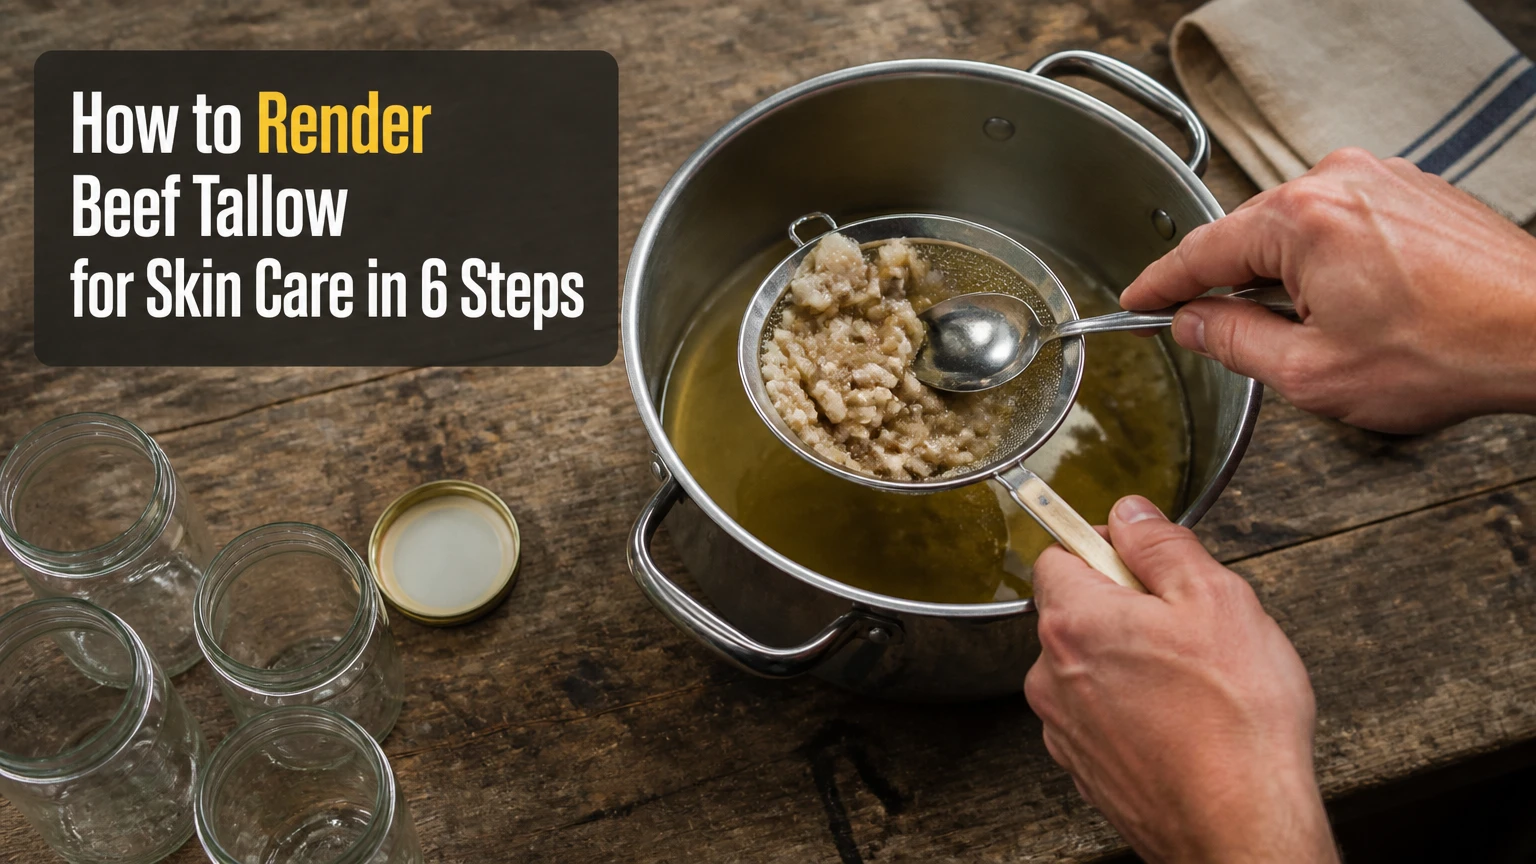
To render beef tallow for skin care, chill and clean suet, wet-render it at 130-140°F, strain, wash the solid fat with brine, dry it completely, and jar it. The six-step process takes about 6-8 hours, requires beginner-level cooking skills, and succeeds or fails on moisture control.
Before You Start
Use clean kidney suet when possible because it usually contains less connective tissue and has a milder aroma than trimming fat. Ask the butcher for fresh, unseasoned suet intended for rendering, then keep it refrigerated below 40°F (4°C) until you process it.
The cost depends on whether you buy suet retail or receive it from a butcher. The table gives typical home-batch figures, not fixed prices.
| Item | Quantity or specification | Typical cost | Purpose |
|---|---|---|---|
| Beef suet | 1-5 lb, chilled, preferably kidney fat | $5-$30 | Main fat source |
| Filtered water | 1 cup for rendering, 1 cup per wash | Under $1 | Prevents initial scorching and carries residue away |
| Fine sea salt | 2 tablespoons per purification wash | Under $1 | Makes a brine that helps separate water-soluble residue |
| Slow cooker | Low setting, ideally 130-140°F | $25-$70 | Gentle, steady heating |
| Heavy stockpot | Thick base and accurate thermometer | $30-$100 | Stovetop alternative |
| Fine-mesh strainer | Heat-resistant, 6-8 inches wide | $5-$15 | Removes cracklings |
| Unbleached cheesecloth | Four folded layers | $4-$10 | Captures fine sediment |
| Glass bowl | Heatproof, 2-4-quart capacity | $5-$15 | Receives strained fat |
| Knife and board | Sharp knife, stable board | Existing equipment | Cuts chilled suet |
| Food processor | Optional, short pulses only | Existing equipment | Speeds chopping |
| Mason jars | Sterilized, dry, tight-fitting lids | $1-$3 each | Final storage |
| Infrared or probe thermometer | Reads at least 100-200°F | $10-$30 | Confirms gentle heat |
Prerequisites: You need basic knife safety, a heatproof work surface, good ventilation, and enough refrigerator space for the bowl. Never pour hot fat into a cold, thin glass container, and never wash liquid fat down a drain because it hardens inside plumbing.
Six-Step Process at a Glance
| Step | Action | Typical time | Most common mistake |
|---|---|---|---|
| 1 | Select and chill clean suet | 30 minutes | Using fat with meat or connective tissue |
| 2 | Sanitize and dry equipment | 15-20 minutes | Sealing moisture into the finished jar |
| 3 | Wet-render the chopped fat | 4-6 hours | Heating above 150°F (65°C) |
| 4 | Strain and cool the first render | 15 minutes plus 2 hours | Pressing sediment through the cloth |
| 5 | Wash the tallow with brine | 30 minutes plus 2 hours per wash | Calling wet tallow finished |
| 6 | Dry, jar, label, and store | 20-30 minutes | Filling jars with hidden water |
Prepare the Fat and Equipment
Step 1: Select, Chill, and Trim the Suet
Chill the suet for 30 minutes, trim every nonfat fragment, and cut the fat into pea-sized pieces.
Place the suet in a freezer-safe bag or covered tray for 30 minutes, not several hours, so it firms without becoming difficult to cut. Put the chilled fat on a stable cutting board and remove red meat, visible blood, membrane, gristle, and any dark discolored areas. Cut the remaining white fat into pieces about 1/2 inch, or pulse it in a food processor five to ten times until the pieces resemble peas. Work in batches if the processor warms the fat. Return soft pieces to the freezer for another 10 minutes before continuing.
You’ll know it worked when the pieces are firm, pale, and mostly uniform, with no visible meat or rubbery connective tissue.
The common mistake is grinding the suet into a paste. A paste melts unevenly and can carry more protein sediment into the liquid. Use short pulses rather than continuous processing.
Step 2: Sanitize, Dry, and Arrange the Work Area
Clean, heat-sanitize, and completely dry every tool and storage jar before heating the fat.
Wash the bowl, strainer, knife, board, spoon, jars, and lids with hot soapy water. Rinse well, then sanitize heat-safe glass jars by boiling them for 10 minutes or by following the jar manufacturer’s sanitizing instructions. Air-dry them upside down on a clean towel, then inspect each jar for droplets. Lids should be clean and dry; do not boil lids unless their manufacturer permits it. Fold unbleached cheesecloth into four layers and place it inside the strainer before the fat becomes hot. Set the bowl on a heatproof mat.
Have tongs, a probe thermometer, paper towels, and a second clean pot ready. A prepared station prevents the rushed handling that causes spills.
You’ll know it worked when no water beads remain inside the jars, bowl, strainer, or cheesecloth.
The common mistake is treating “sterilized” as sufficient. A jar can be sanitized yet still contain moisture. Cosmetic tallow has no water-based preservative system, so dryness matters more than a sterile label.
Render and Separate the Tallow
Step 3: Wet-Render the Chopped Suet Slowly
Combine the chopped suet with 1 cup of filtered water and heat it at 130-140°F (54-60°C) for 4-6 hours.
Put the fat into a slow cooker or heavy-bottomed stockpot and add 1 cup filtered water for each 1-5-pound batch. Set a slow cooker to LOW, or use the lowest stovetop setting while monitoring the liquid with a probe thermometer. Keep the fat between 130°F and 140°F, and do not let it exceed 150°F (65°C). Stir gently every 30 minutes during the first two hours, then check at least hourly. Keep the lid slightly ajar if steam is collecting heavily.
The water protects the fat during the initial melting stage; it will separate later. Continue until the liquid looks clear and the remaining cracklings are small, dry, and lightly golden. Stop before they turn brown or smell roasted.
You’ll know it worked when pale-gold liquid surrounds dry solids, with no raw fat chunks and no burnt or pot-roast aroma.
The common mistake is relying on a slow cooker’s word “LOW” without checking its actual temperature. Appliance settings vary. Use a thermometer, especially during the first batch.
Step 4: Strain the Hot Liquid and Chill the Fat
Strain the hot render through four layers of cheesecloth, then refrigerate it for 2 hours to separate the fat from the water and sediment.
Turn off the heat and let the liquid stop bubbling for about 2 minutes. Carefully pour it through the lined strainer into a heatproof glass bowl, keeping your hands and face away from steam. Do not wring the cheesecloth aggressively; press it gently with clean tongs if necessary, because squeezing can force fine particles through the filter. Leave the cracklings behind. Cool the bowl uncovered at room temperature until it is no longer steaming, then refrigerate it for about 2 hours.
The tallow will harden into a floating white, cream, or pale-yellow disc. Water and brown protein residue will remain underneath.
You’ll know it worked when the disc lifts away cleanly and its underside has a distinct brown or gray layer that can be scraped off.
The common mistake is pouring boiling liquid into a thin or cold glass bowl. Use heatproof glass and avoid thermal shock. Never move a very hot bowl directly into a cold refrigerator.
Purify and Remove Moisture
Step 5: Repeat the Brine Wash Until the Fat Is Clean
Scrape the underside, melt the tallow with 1 cup water and 2 tablespoons salt, then chill and repeat the wash one or two times.
Lift the hardened disc from the bowl and scrape away the entire bottom layer with a clean spoon or dull knife. Discard the brown jelly-like residue. Melt the tallow in a clean pot over low heat, then add 1 cup filtered water and 2 tablespoons fine sea salt. Stir gently for 5 minutes, avoiding splashes. Pour the mixture into a clean heatproof bowl and refrigerate it for about 2 hours.
Lift out the new disc and scrape its underside again. For a mild-smelling balm, perform one wash. For the whitest, mildest batch, perform two or three total washes, using fresh water and salt each time. Salt helps create a brine that carries water-soluble residue away, but it does not sterilize tallow or act as a cosmetic preservative.
You’ll know it worked when the bottom residue becomes thin or nearly absent, the fat is pale, and the aroma is mild rather than meaty.
The common mistake is adding essential oil to mask a scorched smell. Do not use fragrance to rescue burnt fat. Discard severely scorched material, and patch-test any optional skin-safe fragrance separately because essential oils can irritate sensitive skin.
Step 6: Dry, Melt, Fill, and Store the Finished Tallow
Dry the purified disc completely, melt it without water, and fill dry jars while the tallow is just liquid.
After the last wash, scrape the underside carefully and pat the disc dry with clean paper towels. Let it sit on a dry plate for 10-15 minutes, then inspect the surface and underside for glossy droplets. Melt the dry tallow in a clean pot over low heat, stopping as soon as it becomes liquid. Do not add water during this final melt. If the fat crackles or spits, moisture remains, so continue gentle heating until the crackling stops, without exceeding 150°F (65°C).
Pour into dry Mason jars, leaving about 1/2 inch of headspace. Keep the lids off until the tallow reaches room temperature, then seal, label with the date, and refrigerate.
You’ll know it worked when the filled tallow cools quietly, has no watery layer, and sets into a smooth, uniform balm.
The common mistake is sealing warm jars immediately. Condensation can form under the lid and reintroduce water. For the lowest contamination risk, use a clean spatula and avoid dipping wet fingers into the jar.
Quality Checks Before Skin Use
Check the finished batch against these practical targets. They are practitioner checkpoints, not regulated cosmetic specifications.
| Check | Acceptable result | Warning sign | Action |
|---|---|---|---|
| Color | White, cream, or pale yellow | Dark brown or gray throughout | Discard if scorching is suspected |
| Aroma | Mild, fatty, or nearly odorless | Strong cooked-beef smell | Repeat one brine wash if not burnt |
| Texture | Smooth, dense balm | Water pockets or wet streaks | Remelt and dry, or discard |
| Surface | Dry and even | Beads, bubbling, or condensation | Do not jar until moisture is gone |
| Skin test | No redness or burning after 24 hours | Itching, swelling, or rash | Wash off and discontinue |
Apply a pea-sized amount to a small area of the inner forearm and observe it for 24 hours before using the balm on the face. Tallow is an occlusive animal fat, so people with acne-prone or highly reactive skin may prefer testing the jawline first rather than applying it broadly.
Common Mistakes and How to Fix Them
| Symptom | Likely cause | Safe correction |
|---|---|---|
| Strong beef odor | Incomplete trimming, too much heat, or insufficient washing | If not burnt, remelt with fresh brine and repeat one or two washes. Discard if the smell is roasted or acrid |
| Yellow or brown tallow | Scorching or browned protein | Strain once more only if the aroma is clean. Scorched batches are not worth using on skin |
| Gritty texture | Slow, uneven crystallization or sediment | Remelt gently, filter through fresh four-layer cheesecloth, and cool in a shallow jar in the refrigerator |
| Water under the disc | Normal separation after wet rendering | Scrape it away completely, dry the disc, and perform the final melt without water |
| Spitting during final melt | Hidden moisture remains | Heat on low until bubbling stops, then cool slightly before filling. Persistent spitting means the batch needs another drying cycle |
| Mold or fuzzy growth | Water, contaminated tools, or wet fingers entered the jar | Discard the entire affected jar. Do not scrape off mold or re-render it for skin use |
Never pour hot fat into a sink. Let residue solidify, wipe the pot with paper towels, and place the towels in the trash before washing the cookware.
Variations for Different Equipment and Batches
Slow Cooker Method
A slow cooker is the easiest option for beginners because it reduces direct scorching risk. Use the LOW setting, but verify the fat temperature with a thermometer. Some cookers run hotter than 140°F, so switch to a lower setting or use short heating intervals if needed. Keep the lid slightly ajar when excess steam collects.
Stovetop Method
Use a thick-bottomed stainless-steel pot over the lowest burner setting. Add the same 1 cup water and stir every 15-30 minutes while the fat begins melting. A stovetop batch may finish in 3-5 hours, but it needs closer supervision because the base can overheat before the surface looks hot.
Oven Method
Place the fat and 1 cup water in a covered Dutch oven and heat at 200°F (93°C). The oven air temperature is higher than the target fat temperature, so check the liquid with a thermometer after 60 minutes and every hour thereafter. Finish when the fat itself remains below 150°F (65°C), not when the oven reaches a particular time.
Small and Large Batches
For 1 pound of suet, use 1 cup water for the first render and 1 cup per purification wash. For a 5-pound batch, do not overcrowd a small cooker. Divide it between two vessels if the fat forms a deep, slow-melting mass.
| Batch size | Expected finished tallow | Recommended vessel |
|---|---|---|
| 1 lb suet | About 10-14 oz | 2-quart slow cooker or pot |
| 2-3 lb suet | About 1.25-2.5 lb | 4-quart cooker |
| 4-5 lb suet | About 2.5-4 lb | 6-quart cooker or two vessels |
Finished yield varies with connective tissue, trimming, and how much fat remains in the cracklings. Weigh the final product rather than estimating from the starting weight.
How Long Does It Take and What Does It Cost?
Active preparation usually takes 45-75 minutes. Heating takes 4-6 hours, first cooling takes about 2 hours, and each brine wash adds approximately 30 minutes of handling plus 2 hours of chilling. A one-wash batch commonly takes 7-9 hours elapsed, while two or three washes can extend the process to 11-15 hours.
| Cost factor | Typical range | What changes it |
|---|---|---|
| Suet | $5-$30 | Butcher source, grass-fed claims, and batch size |
| Salt and water | Under $3 | Number of washes |
| Cheesecloth | $4-$10 | Reusable versus disposable quality |
| Jars | $2-$12 | Number and size |
| Total consumables | About $10-$50 | Existing tools reduce the cost |
Grass-fed suet may cost more, but “grass-fed” does not guarantee clean handling or a mild aroma. Freshness, careful trimming, and low heat usually influence the finished smell more than the label alone.
Frequently Asked Questions
Is wet rendering better than dry rendering for skin products?
Wet rendering is usually easier to control because the water buffers the fat against early scorching and helps separate protein residue. Dry rendering can produce a clean result, but it demands closer temperature control and often leaves a stronger aroma if the solids brown. Choose wet rendering for a first batch or when odor reduction matters most.
How many times should tallow be purified?
Use one wash when the first render is pale and mildly scented. Use two or three total washes when the fat contains visible brown residue or a noticeable beef aroma. More washes do not compensate for scorched fat, contaminated equipment, or trapped moisture. Stop when the underside is clean and the aroma is mild.
Can I use regular beef trimming fat instead of kidney suet?
Yes, but expect more trimming and potentially more odor. Fat from around muscles can include meat, connective tissue, and moisture, while kidney suet is generally cleaner and firmer. Remove every visible nonfat fragment and consider an additional brine wash before the final drying stage.
Why did my tallow turn grainy after cooling?
Tallow can develop a grainy feel when fat crystals form unevenly during slow cooling. Remelt the batch completely, filter it while liquid, pour it into a shallow clean jar, and refrigerate it promptly. Rapid cooling often produces a smoother balm, although natural variation in texture can remain.
How long does homemade cosmetic tallow last?
A completely dry, well-filtered batch stored in a sealed jar in the refrigerator commonly remains usable for several months, but homemade products lack laboratory stability testing. Label the date, use clean hands or a spatula, and discard the batch if it develops mold, sour odor, water pockets, or an unusual color.
Can I add lavender, calendula, or other ingredients?
Add only fully dried, skin-appropriate ingredients after you understand the base batch. Fresh herbs introduce water and can cause spoilage; essential oils can cause sensitization. For a first attempt, keep the tallow plain, patch-test it, and formulate any infused balm by weight with a documented cosmetic recipe rather than adding drops by guesswork.
Final Result
The reliable way to render beef tallow for skin care is to start with clean chilled suet, keep the melt below 150°F, separate the water and sediment through repeated washes, and verify complete dryness before jarring. Refrigerate the labeled balm, patch-test a small area, and discard any batch with mold or persistent scorching.


