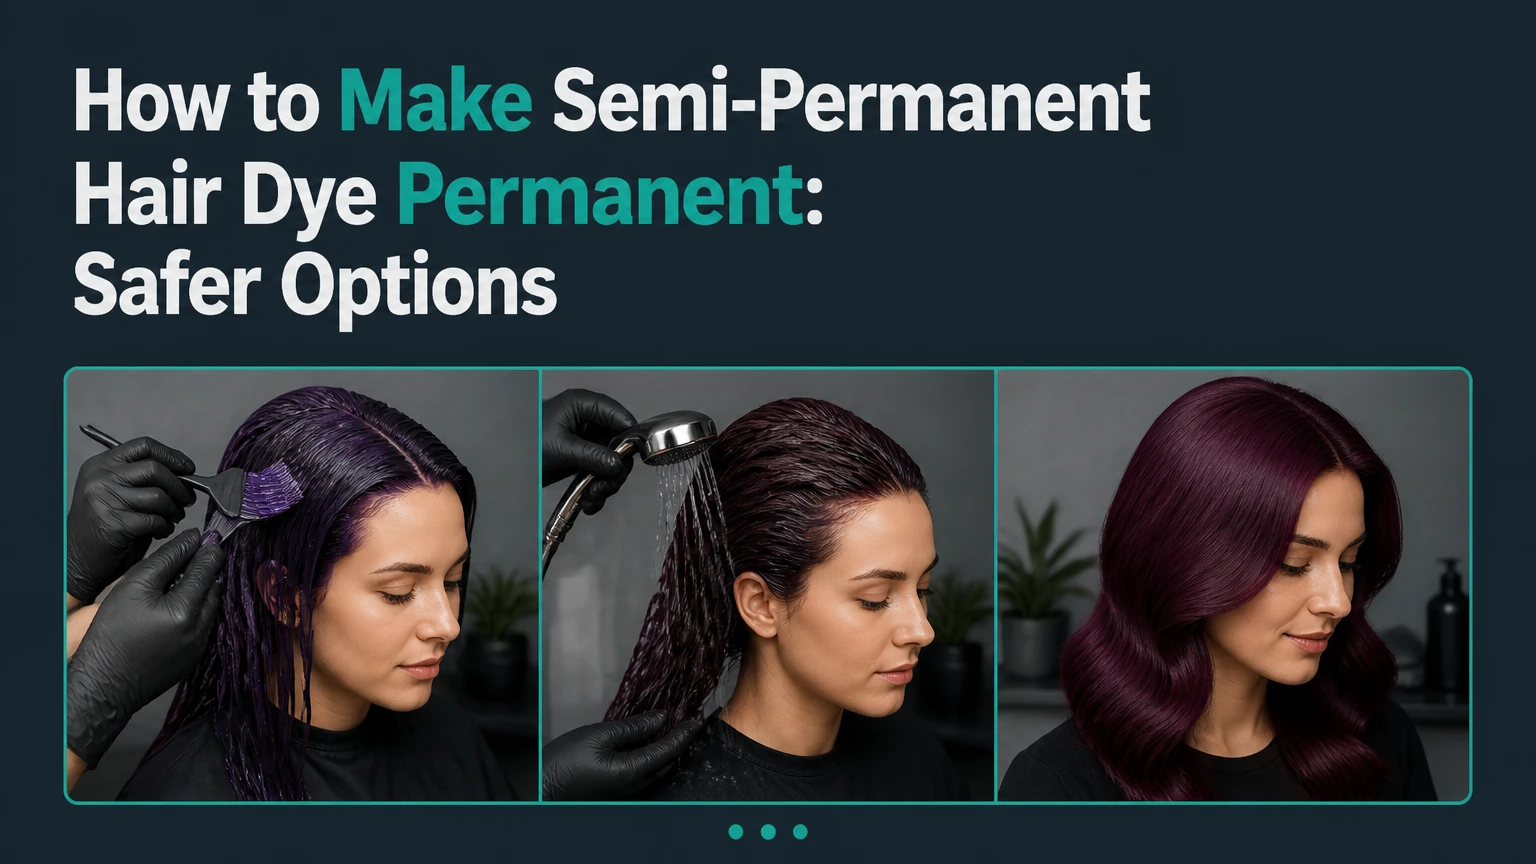
You cannot chemically turn semi-permanent hair dye into permanent color at home. Semi-permanent, or direct, dye deposits pre-formed pigments on and near the hair cuticle, while permanent color uses oxidation to develop dye molecules inside the cortex. You can extend direct-dye color to roughly 4-8 weeks by controlling porosity, application, rinsing, heat, and washing.
Key Facts
Semi-permanent hair dye contains pre-formed pigments and normally requires no developer.
Bleaching can improve color intensity and retention, but it permanently increases hair porosity and damage risk.
Hydrogen peroxide developer should not be mixed with a direct dye unless the product instructions specifically require it.
Thorough saturation matters more than leaving direct dye on for several extra hours.
Typical direct-dye longevity ranges from 2-6 weeks, while porous pre-lightened hair may retain visible color for 4-8 weeks.
Demi-permanent color is a better choice than direct dye when you need longer-lasting blending or moderate gray coverage.
Can Semi-Permanent Hair Dye Become Permanent?
Semi-permanent hair dye cannot become permanent because its pigment chemistry does not permanently alter the hair shaft. Direct dyes can remain visible for many washes, especially on porous hair, but shampoo, friction, ultraviolet exposure, heat, and water gradually remove or change the deposited color.
Permanent hair color uses an alkaline agent and an oxidizing developer to create smaller color molecules within the cortex. Direct dyes arrive already colored, so they do not need that oxidation step. Product names vary, and some brands use “semi-permanent” loosely, making the ingredient list and instructions more reliable than the label alone.
The safe goal is therefore maximum retention, not chemical conversion. A good application can make a shade look nearly permanent on highly porous hair, but the result remains dependent on the hair’s condition and the shade’s pigment behavior.
What does “permanent” mean in hair color?
“Permanent” means the color is formed inside the hair through oxidation and remains until the hair grows out or is recolored. It does not mean the shade never changes, because permanent color can fade, oxidize, become brassy, and lose tone even though some artificial pigment remains.
Why Does Semi-Permanent Color Fade?
Semi-permanent color fades because repeated washing removes surface and near-surface pigment from the cuticle. Porosity, cleansing strength, water temperature, UV exposure, heat styling, and the original shade determine how quickly that loss becomes visible.
Hair consists largely of keratin fibers protected by overlapping cuticle cells. Damage, bleaching, chemical relaxing, repeated heat, and mechanical abrasion can lift or roughen those cells. Porous hair often accepts more color initially, but it can also release pigment unevenly, which causes fast fading, dull ends, or patchy bands.
Dark red, magenta, and some violet dyes often remain visible longer than pale pastels. Blue and turquoise can stain light hair and leave green or gray residues as the tone changes. A pastel shade has less pigment concentration, so even modest washout produces a noticeable difference.
| Hair condition | Typical color behavior | Typical visible life | Main risk |
|---|---|---|---|
| Virgin, healthy level 3-6 hair | Limited deposit and lower brightness | 1-3 weeks | Weak or barely visible result |
| Virgin, coarse or resistant hair | Uneven surface acceptance | 1-3 weeks | Patchy coverage |
| Bleached level 8-10 hair | Strong deposit and high brightness | 4-8 weeks | Staining and uneven fade |
| Chemically damaged ends | Rapid but heavy initial uptake | 1-4 weeks | Muddy or banded color |
| Gray or white hair | Variable pigment acceptance | 1-4 weeks | Translucent coverage |
A practical rule from salon color work is that porosity controls retention more than processing time. Leaving a direct dye on for two hours cannot repair a cuticle that is overly damaged or coated with product.
Should You Pre-Lighten Your Hair?
Pre-lightening is the most reliable way to make a vivid direct dye look stronger and last longer, but it does not make the dye permanent. Bleach removes or lightens natural melanin and increases the number of porous sites that can accept direct pigment.
Pre-lightening is useful when the target is pink, blue, purple, green, turquoise, or another fashion color on dark hair. A medium brown base may only show a tint, while a level 9 or 10 blonde base produces a brighter result. The required base depends on the shade: yellow undertones can distort blue and violet, while orange undertones can alter green and teal.
Do not bleach solely to extend color on already fragile hair. Elastic, gummy, snapping, severely tangled, or chemically relaxed hair needs a professional assessment first. A strand test should include the actual bleach, developer, processing time, and direct dye because porosity can vary across one head.
| Target shade | Common useful base | Typical pre-lightening concern | Better approach |
|---|---|---|---|
| Pastel pink | Level 9-10 | Yellow base dulls softness | Neutralize only if product permits |
| Electric blue | Level 9-10 | Yellow creates green cast | Reach an even pale base |
| Magenta | Level 7-9 | Uneven orange areas show through | Section and pre-lighten bands |
| Forest green | Level 7-8 | Red or copper undertones shift tone | Test over the exact base |
| Burgundy | Level 4-6 | Lightening may be unnecessary | Deposit over a darker base |
Typical DIY pre-lightening takes 45-90 minutes, including application and development, while a salon appointment commonly takes 2-4 hours. Costs vary by region, length, and color correction history; typical salon pricing is approximately $80-$250, and a DIY kit commonly costs $15-$40.
Should You Mix Developer With Direct Dye?
Do not mix hydrogen peroxide developer with a semi-permanent direct dye unless the manufacturer explicitly instructs you to do so. Peroxide can alter, dilute, or destroy pre-formed fashion pigments, and it may create an uneven result rather than anchoring the color.
A 10-volume developer is not a universal “cuticle opener.” Developer is formulated for compatible oxidative color or lightener systems, and using it alone can create dryness, uneven lift, scalp irritation, or unwanted warmth. A direct dye designed for no-developer use should be applied exactly as directed.
If you want color that uses a developer and lasts longer, choose a demi-permanent or permanent product designed as a complete system. Demi-permanent color generally uses a low-volume developer and deposits or slightly shifts tone without the same lifting capacity as permanent color. Follow the product’s mixing ratio, timing, and allergy instructions.
| Color system | Developer required | Typical effect | Typical longevity |
|---|---|---|---|
| Direct or semi-permanent dye | No, unless label says otherwise | Surface and cuticle deposit | 2-6 weeks |
| Demi-permanent color | Usually yes | Tone deposit with limited shift | 4-8 weeks |
| Permanent color | Yes | Lift and oxidation inside cortex | New growth remains |
| Temporary color spray or wax | No | Surface coating | 1 shampoo |
| Henna or plant dye | No peroxide | Staining and coating | 4-8 weeks or longer |
Before You Start
Use the following preparation plan before applying direct dye. The biggest retention factor is complete, even saturation on clean hair without oil, silicone buildup, or heavy conditioner.
| Preparation item | Typical quantity or setting | Why it matters |
|---|---|---|
| Clarifying shampoo | 1 wash, 5-10 minutes | Removes oil and styling residue |
| Direct dye | 118-236 mL for shoulder-length hair | Provides full saturation |
| Nitrile gloves | 1 pair | Reduces skin staining |
| Plastic cap | 1 cap | Holds moisture and warmth |
| Sectioning clips | 4-8 clips | Improves even application |
| Processing time | Product label, commonly 20-45 minutes | Controls deposit without guesswork |
| Total appointment time | 60-120 minutes | Includes prep, application, and rinse |
| Typical DIY cost | $15-$60 | Depends on dye quantity and tools |
Perform a patch test and strand test according to the product label. Avoid coloring an irritated, sunburned, scratched, or recently abraded scalp. FDA guidance notes that hair dye reactions can occur even after previous uneventful use, so a prior successful application does not remove the need to follow current safety directions.
How to Make Semi-Permanent Hair Dye Permanent in Practice
The following method cannot create permanent chemistry, but it maximizes the amount of direct pigment deposited and reduces early washout. Use the dye manufacturer’s instructions when they differ from general guidance.
Step 1: Assess the Hair and Choose the Base
Inspect the roots, mids, and ends separately before coloring. Identify virgin, bleached, heat-damaged, relaxed, gray, and previously dyed sections because each area may absorb and release pigment at a different rate.
Choose a shade that works with the existing undertone. Apply a test section behind the ear or underneath the hair, then evaluate the result in daylight after the test strand dries completely.
You will know it worked when: the test strand reaches the intended tone without excessive dryness or an unexpected green, orange, or muddy cast.
Common mistake: judging wet hair, which often looks darker and more saturated than the finished dry result.
Step 2: Remove Buildup Without Over-Stripping
Wash once with a clarifying shampoo if the hair contains dry shampoo, oil, wax, hairspray, or silicone-heavy styling products. Rinse thoroughly and skip conditioner immediately before coloring, because a coating can reduce contact between pigment and the fiber.
Do not use a high-pH chemical treatment simply to force the cuticle open. A clean, towel-dried or fully dry surface, as specified by the product, is sufficient for most direct dyes.
You will know it worked when: the hair feels clean but flexible, with no slippery film between the fingers.
Common mistake: applying dye over oily roots or a thick leave-in treatment, producing weak root deposit.
Step 3: Divide the Hair Into Small Sections
Separate the hair into four to eight sections, depending on density. Work with 1-2 cm slices, starting where the color needs the greatest saturation, and keep the product container open only as long as necessary.
Use enough dye to coat every strand. Shoulder-length, medium-density hair often needs 118-236 mL, while thick or waist-length hair may need two or more containers.
You will know it worked when: every section looks uniformly wet with dye and no pale strands remain visible.
Common mistake: rubbing a small amount over the surface like shampoo. Direct dye needs physical saturation, not a thin film.
Step 4: Apply the Dye and Process Gently
Apply direct dye from roots to ends, using a tint brush or gloved hands to press color into the strands. Follow the label timing, commonly 20-45 minutes; extend only when the manufacturer permits it.
A plastic cap can retain warmth and prevent dripping. Mild ambient warmth may improve comfort and spread, but do not use high heat, a hot flat iron, or an improvised heated chemical process. Heat does not permanently drive pigment into the cortex.
You will know it worked when: the product remains evenly distributed during processing and the hair does not become hot, painful, or irritated.
Common mistake: assuming extra heat compensates for inadequate product. It does not.
Step 5: Rinse With Cool or Lukewarm Water
Rinse with cool to lukewarm water until the runoff is mostly clear. Water temperature does not “snap” the cuticle shut, but cooler water usually reduces comfort issues and may limit immediate dye movement compared with very hot water.
Avoid aggressive rubbing during the first rinse. Use an acidic color-safe conditioner or the brand’s post-color treatment if directed, then rinse again without scrubbing the scalp.
You will know it worked when: the water is lightly tinted rather than heavily opaque, and the hair feels smooth without a waxy coating.
Common mistake: rinsing with very hot water for several minutes, which increases pigment movement and can dry the fiber.
Step 6: Dry and Protect the Finished Color
Blot with a dark microfiber towel and air-dry or use a dryer on low to medium heat. Avoid shampoo for the interval recommended by the manufacturer, commonly 24-72 hours, because the first wash removes loosely held surface pigment.
Sleep on a smooth satin or silk-style pillowcase if transfer is a concern, and avoid pale clothing until the hair has passed a dry-transfer test.
You will know it worked when: the dry hair has an even tone, acceptable softness, and minimal transfer from a lightly damp white cloth.
Common mistake: applying oil or heavy silicone serum while the color is still transferring, which can spread pigment onto clothing and bedding.
How Long Can Semi-Permanent Color Last?
Semi-permanent color typically lasts 2-6 weeks, while vivid color on evenly pre-lightened hair can remain visibly strong for approximately 4-8 weeks. Frequent shampooing, hot water, swimming, high heat, UV exposure, and porous ends can shorten those ranges substantially.
The phrase “lasts eight weeks” usually means some color remains after eight weeks, not that the shade looks unchanged. A pastel may lose half its visual intensity after a few washes, while a dark red or deep purple can leave a residual stain for months.
| Washing pattern | Water and styling exposure | Typical direct-dye result |
|---|---|---|
| Daily shampoo, hot water | Frequent heat styling | 1-2 weeks |
| Shampoo every other day | Moderate heat use | 2-4 weeks |
| Shampoo 1-2 times weekly | Cool water, low heat | 4-6 weeks |
| Weekly washing | Pre-lightened, protected hair | 6-8 weeks |
| Swimming several times weekly | Chlorine or salt exposure | Under 3 weeks |
These are practitioner ranges, not guarantees. The exact formulation, pigment family, porosity, cleansing product, and starting shade can change the result.
How Should You Maintain the Result?
Wash less often with a sulfate-free or color-formulated cleanser, use cool or lukewarm water, and reduce direct heat. A pigment-depositing conditioner can refresh the shade, but it should be tested first because repeated use may create darker roots, stained hands, or uneven ends.
Apply conditioner mainly through the lengths and ends, detangle from the ends upward, and use heat protection before blow-drying or styling. UV-protective hair products may reduce environmental fading, although they cannot prevent all color change.
A small amount of the original direct dye can sometimes be mixed into a compatible white conditioner for a custom refresher. Use gloves, record the ratio, and test the mixture because some dyes stain intensely even when diluted.
| Maintenance action | Suggested frequency | Retention benefit | Main limitation |
|---|---|---|---|
| Color-safe shampoo | 1-2 times weekly | Reduces detergent exposure | Does not stop all fading |
| Cool or lukewarm rinse | Every wash | Limits heat-related dryness | Cannot seal pigment permanently |
| Pigment conditioner | Every 1-2 weeks | Replaces lost tone | Can build up unevenly |
| Heat protectant | Every heat session | Reduces thermal stress | Does not restore damaged hair |
| Clarifying shampoo | Every 3-6 weeks, if needed | Removes buildup | May remove direct color faster |
| Chlorine protection | Before every swim | Limits chemical exposure | Requires thorough rinsing afterward |
Which Color Type Is Best for Gray Hair?
Demi-permanent or permanent color is generally more suitable than ordinary direct dye for dependable gray coverage. Gray and white hair can accept direct pigment unevenly, while permanent color provides the oxidation system needed for more predictable coverage and a longer-lasting root result.
Demi-permanent color can blend gray and add tone with less lift than permanent color, but it may not fully cover resistant white hair. Permanent color is more appropriate when the goal is opaque coverage, a substantial level change, or consistent roots.
Do not use a 10-volume developer with a direct dye simply because the hair is gray. Select a color system designed for gray coverage, perform the required allergy test, and consult a professional when the percentage of gray is high or the hair has overlapping chemical services.
How Do You Stop Bleeding and Patchiness?
Bleeding usually results from loose surface pigment, excess application, porous hair, or repeated moisture, while patchiness usually results from uneven porosity, insufficient product, inconsistent section size, or an uneven lightened base. Neither problem is reliably fixed by an acidic rinse alone.
For bleeding, rinse more thoroughly, dry the hair completely, use a dark towel, and reduce prolonged wet contact. For patchiness, wait until the hair is dry before assessing it, then reapply dye only to lighter sections rather than processing the entire head again.
| Problem | Likely cause | Immediate response | Next-color correction |
|---|---|---|---|
| Fades after first wash | Buildup or low saturation | Use gentle cleanser and assess dry hair | Clarify before application |
| Dark ends, pale roots | Porosity or section timing | Avoid full-head reapplication | Equalize porosity and start resistant areas first |
| Blue turns green | Yellow underlying base | Use a compatible corrective tone | Test over a cleaner pale base |
| Color transfers to pillows | Excess surface pigment | Rinse again and dry fully | Reduce product pooling and wet sleep |
| Muddy result | Overlapping tones or damaged ends | Do not immediately bleach | Seek a strand-tested correction plan |
Protein treatments require caution. A damaged strand may benefit from a suitable strengthening product, but excessive protein can make some hair stiff and brittle. Moisture, bond-support products, trimming, and professional evaluation may be more appropriate than repeatedly adding protein.
What About Relaxed Hair, Extensions, and Sensitive Scalps?
Relaxed, permed, or severely bleached hair needs a strand test because its porosity and strength differ from untreated hair. Direct dye is often less chemically aggressive than permanent color, but staining, dryness, and uneven absorption remain possible.
Human-hair extensions can accept direct dye, but wefts, tape, keratin bonds, synthetic fibers, and coated extensions behave differently. Never assume synthetic hair will absorb human-hair dye, and keep dye away from adhesive areas unless the extension manufacturer approves the process.
Sensitive scalps require a patch test and strict avoidance of broken skin. Stop immediately if burning, swelling, hives, breathing difficulty, or intense itching develops, and seek urgent medical care for serious symptoms. The American Academy of Dermatology Association recommends following package directions and performing a skin test before each use of permanent hair dye because sensitization can develop over time.
Does Hair Electrolysis Make Dye Permanent?
Hair electrolysis does not make semi-permanent hair dye permanent because electrolysis targets individual hair follicles, not pigment in the visible hair shaft. A licensed electrologist uses electrical energy to damage the follicle’s growth capacity, while cosmetic hair color remains on the cuticle and fades through washing.
Electrolysis can provide permanent hair removal under appropriate professional treatment, but it has no role in locking color into scalp hair, wigs, extensions, eyebrows, or facial hair. Do not combine an electrolysis appointment with fresh chemical coloring on irritated skin; schedule services separately and follow the practitioner’s aftercare instructions.
This distinction matters because “permanent hair” and “permanent hair color” describe different outcomes. Electrolysis changes future hair growth. Permanent dye changes the color of existing fibers until new growth appears or the color is removed.
When Is Permanent Dye the Better Alternative?
Permanent dye is the better alternative when you need opaque gray coverage, reliable lift, a major color change, or a result that remains through many shampoos. Demi-permanent dye is the better middle option when you want longer wear and gray blending without the full lifting action of permanent color.
Direct dye remains the best fit for temporary fashion shades, low-commitment experimentation, and refreshing pre-lightened hair. It is not a substitute for permanent color when the target is lighter virgin hair, consistent gray coverage, or a standardized root formula.
| Goal | Most suitable system | Developer | Expected maintenance |
|---|---|---|---|
| Temporary pink on blonde hair | Direct dye | None | Refresh every 1-4 weeks |
| Gray blending | Demi-permanent | Low-volume, product-specific | Re-tone every 4-8 weeks |
| Opaque gray coverage | Permanent color | Product-specific | Root retouch as growth appears |
| Lightening dark virgin hair | Permanent color or lightener | Product-specific | Professional consultation advised |
| Dark fashion color on bleached hair | Direct dye | None | Refresh as tone fades |
| One-day costume color | Spray, wax, or chalk | None | Remove at next shampoo |
Common Mistakes to Avoid
- Mixing peroxide into a no-developer dye: Use the direct dye alone unless the label specifies a compatible activator.
- Using bleach on fragile hair: Perform a stretch test and strand test before any lightening service.
- Leaving the dye on indefinitely: Follow the stated processing limit because excessive time rarely compensates for poor saturation.
- Applying conditioner before direct dye: Remove heavy coatings first, then condition after rinsing.
- Washing immediately with hot water: Use cool or lukewarm water and avoid shampoo for the label’s recommended interval.
- Reapplying over every section repeatedly: Target faded areas to prevent dark bands and overloaded ends.
- Ignoring the underlying color: Test blue, green, violet, and pastel shades over the actual base.
- Coloring an irritated scalp: Delay the service until the skin has recovered.
The Bottom Line
You cannot make semi-permanent hair dye permanent through heat, vinegar, cold water, developer, or extended processing. To make semi-permanent hair dye last as long as possible, start with a clean and suitable base, pre-lighten only when the hair can tolerate it, saturate small sections completely, process according to the label, rinse gently, and limit washing, heat, chlorine, and UV exposure.
Choose demi-permanent color for longer-lasting tonal change or gray blending, and choose permanent color for lift and opaque gray coverage. Direct dye is the safer low-commitment option, but its temporary chemistry is also its defining limitation.
Frequently Asked Questions
Can I apply semi-permanent dye to dry hair?
Apply semi-permanent dye to dry or damp hair according to the product instructions, because formulas differ in viscosity and pigment concentration. Many direct dyes perform well on clean, dry hair because water does not dilute the product, but some manufacturers specify towel-dried hair for easier distribution.
Does conditioner make semi-permanent dye last longer?
Conditioner can reduce dryness and friction, but ordinary conditioner does not chemically lock semi-permanent pigment into hair. A color-safe conditioner may improve fiber condition, while a pigment-depositing conditioner can refresh tone by adding new pigment during maintenance.
Can I sleep with semi-permanent dye in my hair?
Do not sleep with semi-permanent dye in your hair unless the manufacturer explicitly permits overnight processing. Extended contact can increase staining, scalp irritation, pillow transfer, and uneven absorption without making the color permanent.
Will semi-permanent dye cover dark brown hair?
Semi-permanent dye usually deposits tone rather than lightening dark brown hair. Dark red, burgundy, deep purple, and blue-black shades may show in direct light, while pastel and bright shades generally require pre-lightening to a suitable blonde base.
Can I remove semi-permanent dye if I dislike it?
Start with repeated gentle washing using a suitable clarifying shampoo, followed by conditioning, because aggressive stripping can damage the cuticle. Avoid applying bleach or permanent color over an unwanted shade without a strand test, especially when blue, green, or black pigment has stained porous hair.
Is demi-permanent color safer than permanent color?
Demi-permanent color generally causes less lift than permanent color because it uses a lower-strength oxidative system, but it is not risk-free. Both systems can irritate skin or damage hair when misused, and the safest choice depends on the hair’s condition, target shade, and required coverage.


