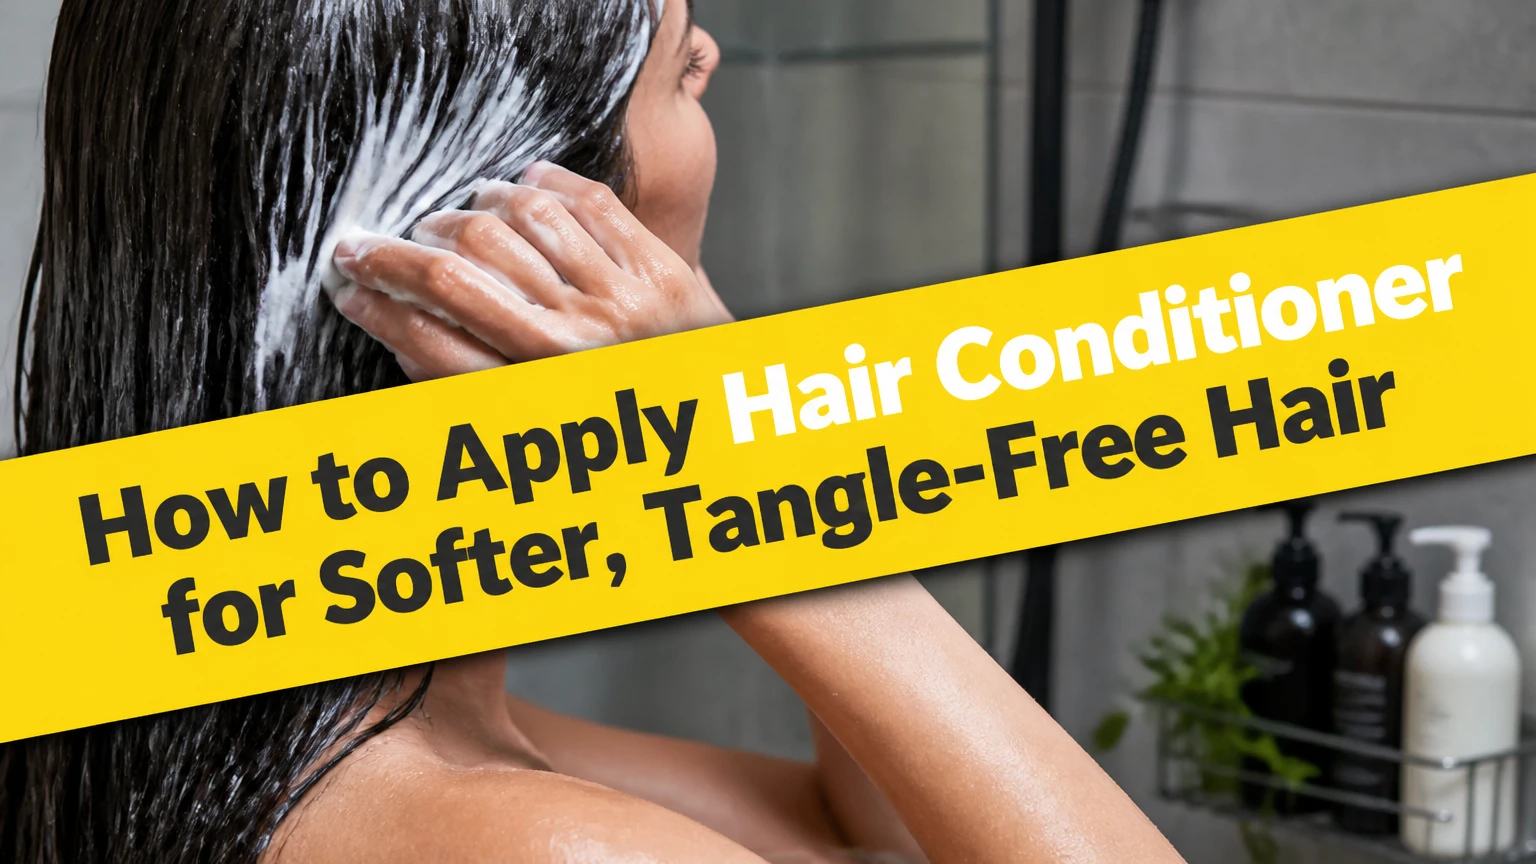
Hair conditioner should be applied after shampooing to clean, wet hair, mainly from the mid-lengths through the ends. Gently squeeze out excess water, distribute a small amount evenly, detangle with fingers or a wide-tooth comb, leave a rinse-out formula for about 2-3 minutes, then rinse thoroughly. The correct amount depends on hair length, density, porosity, and texture.
Key facts at a glance
Rinse-out conditioner belongs primarily on the mid-lengths and ends, not automatically on the scalp.
Removing excess water before application helps conditioner stay on the hair instead of sliding into the drain.
A typical rinse-out conditioner needs about 2-3 minutes, while masks commonly require 5-30 minutes.
Cool water does not physically “seal” the cuticle; complete rinsing and gentle handling have greater practical importance.
Fine hair usually needs less product, while dense, coarse, curly, or highly porous hair usually needs more.
Conditioner reduces friction and improves detangling, but it cannot permanently repair split ends.
What Does Hair Conditioner Do?
Hair conditioner is a cosmetic treatment that improves the hair shaft’s feel, flexibility, shine, and manageability after cleansing. Conditioner does not hydrate living tissue inside the hair because the visible hair shaft is composed of nonliving keratinized cells; instead, conditioning ingredients coat, lubricate, and partly diffuse into damaged areas of the fiber.
Shampoo removes sebum, styling residue, mineral deposits, and particulate soil with surfactants. That cleansing can leave the fiber more negatively charged and rough-feeling, especially when the formula is strong, the water is hot, or the hair is chemically processed. Conditioner counteracts those effects with positively charged conditioning agents, fatty alcohols, oils, polymers, and sometimes silicones.
The practical result is less strand-to-strand friction. Lower friction makes wet detangling safer, reduces snagging during brushing, and improves the way hair reflects light.
How does conditioner work on the hair fiber?
Cationic surfactants such as behentrimonium chloride and cetrimonium chloride attach more readily to damaged, negatively charged regions of hair. Fatty alcohols such as cetyl alcohol and stearyl alcohol add body and slip without functioning like drying alcohols such as ethanol.
Silicones including amodimethicone and dimethicone can form a water-resistant, lubricating film. That film may reduce combing force and protect against repeated friction, although some users need occasional cleansing to remove accumulated styling residue.
The cuticle does not behave like a hinged door that shampoo opens and cold water closes. A conditioner can make cuticle scales lie flatter by lubricating the surface, but the effect is cosmetic and temporary. The American Academy of Dermatology Association recommends using a moisturizing conditioner after shampooing, particularly because conditioner reduces breakage and split ends caused by handling.
What Should You Prepare Before Conditioning?
A standard shower conditioning step takes about 3-5 minutes after shampooing and needs only a rinse-out conditioner, water, and your fingers. A wide-tooth comb is optional, but it is useful for curly, coily, long, or easily tangled hair.
| Preparation factor | Typical value | Why it matters |
|---|---|---|
| Rinse-out conditioning time | 3-5 minutes | Covers application, waiting, and rinsing |
| Product quantity, short hair | 2-5 milliliters | Limits residue on small surface area |
| Product quantity, long or dense hair | 5-15 milliliters | Covers more strands without forcing one large blob |
| Optional detangling tool | 1 wide-tooth comb | Distributes conditioner with less snagging |
| Water temperature | Warm for washing, comfortable for rinsing | Avoids scalp discomfort and excessive heat exposure |
| Product cost | $5-$50 per bottle | Typical drugstore through premium range |
Read the bottle first. A rinse-out conditioner, mask, co-wash, and leave-in product have different directions, and a product marketed for scalp use is an exception to the usual mid-length application rule.
How to Apply Hair Conditioner Correctly
Apply hair conditioner in seven controlled steps: rinse out shampoo, remove excess water, measure the product, spread it through the lengths, detangle gently, wait 2-3 minutes, and rinse completely. The most important variable is even coverage without saturating the roots.
Step 1: Rinse out shampoo completely
Rinse the scalp and hair until the water no longer feels soapy or unusually slick from cleanser. Shampoo residue can make the hair feel coated and may dilute the conditioner before the conditioning agents contact the fiber.
Use the fingertips on the scalp rather than scratching with fingernails. Let the water travel from the roots toward the ends, which carries loosened residue away from the hair.
You’ll know it worked when: the hair feels clean but not coated with foam.
Common mistake: applying conditioner while shampoo is still visible around the hairline.
Step 2: Squeeze out excess water
Gently press the hair from near the ears toward the ends. Do not twist, wring, or pull wet hair, because wet fibers stretch more easily and are vulnerable to mechanical damage.
Conditioner spreads best on damp, saturated hair rather than hair streaming with water. Hair should remain fully wet, but it should not drip heavily when you lift a section.
You’ll know it worked when: water stops running in a continuous stream from the ends.
Common mistake: rubbing with a towel before conditioning, which can increase tangling and friction.
Step 3: Measure a starting amount
Start with approximately 2-5 milliliters for short or fine hair and 5-15 milliliters for long, thick, coarse, or highly porous hair. These are practical starting ranges, not universal rules; a dense waist-length style may require more than a thin shoulder-length style.
| Hair profile | Starting amount | Adjustment signal |
|---|---|---|
| Fine, short hair | 1-2 milliliters | Add 1 milliliter if ends remain rough |
| Fine, shoulder-length hair | 2-4 milliliters | Reduce if roots collapse after drying |
| Medium-density, shoulder-length hair | 4-7 milliliters | Add gradually to dry ends |
| Thick, long, straight hair | 8-15 milliliters | Work in two sections |
| Curly or coily, dense hair | 10-20 milliliters | Use enough for consistent slip |
| Very porous or bleached ends | 6-15 milliliters | Prioritize ends, then reassess |
A quarter-sized amount is an imprecise household measure because coins vary by country and product viscosity varies substantially. Milliliters provide better consistency, especially when comparing a lightweight lotion with a dense mask.
You’ll know it worked when: the hair feels coated enough to detangle without a heavy residue.
Common mistake: dispensing a palmful immediately because the product feels thin.
Step 4: Emulsify and apply from mid-lengths downward
Rub the conditioner between your palms for several seconds, then place it around ear level or lower. Smooth the product downward with flat hands, concentrating on the last one-third of the hair, where weathering, brushing, heat, and chemical services accumulate.
Keep ordinary rinse-out conditioner approximately 2-5 centimeters away from the scalp unless the label specifically instructs scalp application. The scalp produces sebum, while the ends receive little or none of that natural oil.
You’ll know it worked when: the lengths feel uniformly slippery and no dry patches remain.
Common mistake: rubbing conditioner directly into the roots, which can flatten fine hair and make oily scalps appear greasy sooner.
Step 5: Detangle from the ends upward
Separate the hair into two to four sections if it is long, thick, curly, or coily. Use your fingers first, or use a wide-tooth comb beginning at the ends and moving upward in short sections.
Starting at the scalp forces every knot through the entire length and increases pulling. Conditioner improves slip, but slip does not make aggressive brushing safe.
You’ll know it worked when: the comb moves through each section with limited resistance and no scraping sensation.
Common mistake: dragging a brush from roots to tips through one large, tangled mass.
Step 6: Leave rinse-out conditioner for 2-3 minutes
Leave a conventional rinse-out conditioner on the lengths for approximately 2-3 minutes, or follow the product label when it gives a different interval. The waiting period lets conditioning agents deposit and spread; leaving a standard formula on overnight does not convert it into a professional treatment.
Use longer contact times only with a product designed as a deep conditioner or mask. A longer interval can increase residue without improving results when the formula is intended for brief use.
You’ll know it worked when: the strands remain smooth and manageable before rinsing.
Common mistake: assuming more time always produces more moisture.
Step 7: Rinse thoroughly
Rinse from the scalp area toward the ends until the hair feels smooth but no longer coated with a thick, slippery film. Lukewarm, cool, or room-temperature water can all work; cool water may feel comfortable and reduce frizz for some people, but it does not permanently seal the cuticle.
Rinsing is especially important at the nape, behind the ears, and under dense curls. Residue in those areas can contribute to limpness, itching, or buildup.
You’ll know it worked when: the hair is soft and flexible, not waxy, sticky, or slimy.
Common mistake: rinsing only the surface and leaving concentrated product underneath.
Which Conditioner Type Fits Your Routine?
Rinse-out conditioner is the default choice after shampoo, while deep treatments address higher dryness or damage, leave-ins support styling, and co-washes replace conventional shampoo for selected textures. The correct type depends on cleansing needs, fiber condition, density, and styling habits.
| Conditioner type | Contact or wear time | Best use case | Main limitation |
|---|---|---|---|
| Rinse-out conditioner | 2-3 minutes | Routine detangling after shampoo | Temporary surface conditioning |
| Deep conditioner or mask | 5-30 minutes | Bleached, dry, coarse, or chemically treated hair | Can leave fine hair limp |
| Leave-in conditioner | Until next wash | Curl definition, frizz control, heat-prep support | Product buildup if layered heavily |
| Co-wash | 3-5 minutes | Curly, coily, or very dry hair between cleanses | May not remove oil and buildup fully |
| 2-in-1 cleanser | 1-3 minutes | Travel, gym routines, or short hair | Less targeted conditioning |
Should conditioner go on the scalp?
Ordinary rinse-out conditioner should usually stay off the scalp, but scalp-specific products may be formulated for that area. The common claim that all conditioner clogs follicles is too broad: follicle clogging depends on the formula, amount, skin sensitivity, rinsing, and individual tendency toward acne or irritation.
Avoid scalp application when roots become greasy, hair loses volume, or the scalp develops itching or bumps after conditioning. A medicated scalp conditioner or a product labeled for scalp use follows a different application rule.
Is reverse washing useful for fine hair?
Reverse washing can help fine hair that becomes flat from conditioner. Apply a small amount to the mid-lengths and ends first, rinse lightly, then shampoo the scalp and rinse again.
Reverse washing is not a universal improvement. It may remove some conditioning benefit from dry, curly, or highly porous hair, so compare both sequences over two or three wash days rather than changing several products at once.
How Does Hair Type Change the Method?
Hair texture changes the ideal quantity, placement, detangling method, and product weight. The seven-step process remains consistent, but fine straight hair needs restraint while dense curly or coily hair needs sectioning and more thorough distribution.
| Hair situation | Formula preference | Application method | Typical frequency |
|---|---|---|---|
| Fine, straight hair | Lightweight lotion, fewer heavy oils | Apply from jaw or ear level downward | 2-6 washes weekly |
| Thick, coarse hair | Rich cream with fatty alcohols or oils | Divide into 2-4 sections | Every wash, often 1-4 weekly |
| Curly or coily hair | Slip-rich conditioner, optional leave-in | Apply while very wet, finger-detangle | Every wash or co-wash |
| Bleached or colored hair | Moisturizing formula, occasional protein | Focus on porous mid-lengths and ends | Every wash, mask weekly |
| Oily scalp, dry ends | Light formula near ends, normal scalp cleansing | Keep conditioner below ear level | Based on wash schedule |
| Short men’s hair | Lightweight rinse-out formula | Use a pea-sized amount on ends | 1-4 weekly |
How should curly and coily hair be conditioned?
Curly and coily hair usually benefits from applying conditioner in sections while the hair is thoroughly wet. Press the product through the lengths, detangle from ends upward, and rinse partially if the product label permits, or follow with a separate leave-in.
Do not rake aggressively through dry curls. Water and conditioner together provide slip, reduce knotting, and help clumps form. Dense textures may need more product by volume, but excessive product can still cause buildup and dullness.
How should fine hair be conditioned?
Fine hair needs a small quantity applied below the ears or only to the ends. Choose a lightweight conditioner, rinse carefully, and avoid combining a heavy rinse-out formula with oil, cream, and leave-in on the same wash day.
Fine hair is not the same as low-density hair. A person can have fine strands but a large amount of hair, in which case sectioning helps distribute a light formula without applying a heavy layer.
What Are the Alternatives and Trade-Offs?
Rinse-out conditioner is the most efficient option for routine softness and detangling, while masks provide more intensive coating and leave-ins provide continued styling support. No conditioner type permanently repairs a split end, reverses all bleach damage, or replaces appropriate cleansing.
| Option | Typical time | Main benefit | Best avoided when |
|---|---|---|---|
| Rinse-out conditioner | 3-5 minutes | Daily or routine detangling | Formula repeatedly weighs hair down |
| Deep mask | 10-30 minutes | Extra softness for porous lengths | Fine hair becomes limp or coated |
| Leave-in spray | 1-2 minutes | Light detangling and styling | Multiple layers create residue |
| Leave-in cream | 2-5 minutes | Curl support and frizz control | Straight fine hair loses volume |
| Co-wash | 3-5 minutes | Gentler cleansing between shampoos | Scalp is oily or buildup-prone |
A mask is not automatically better than a rinse-out conditioner. Masks often contain higher concentrations of fatty materials, polymers, oils, or proteins, which can improve feel on damaged hair but overwhelm fine hair.
Leave-in conditioner is also not a substitute for heat protection unless the label specifically states a tested heat-protection range. Use a dedicated thermal protectant when blow-drying, straightening, or curling at elevated temperatures.
Why Does Conditioned Hair Still Feel Greasy, Dry, or Tangled?
Conditioned hair can feel greasy because of excess product, scalp application, incomplete rinsing, or a formula that is too rich for the hair’s density. Hair can remain dry when the conditioner is too light, is applied only to the surface, or is removed before it has been distributed through porous areas.
| Symptom after drying | Likely cause | First correction | Reassessment time |
|---|---|---|---|
| Flat, oily roots | Conditioner on scalp or excess quantity | Move application below ears, reduce dose | 1-2 washes |
| Waxy, dull lengths | Silicone, oil, or polymer buildup | Use a clarifying shampoo if suitable | 1 wash |
| Gummy, stretchy hair | Excess moisture or damaged fiber | Reduce mask frequency, assess protein needs | 1-3 weeks |
| Rough ends | Insufficient coverage or chemical damage | Add 1-2 milliliters to ends | 2-3 washes |
| Persistent tangles | Friction, split ends, or poor sectioning | Detangle wet with conditioner, trim if needed | 1-4 washes |
| Itchy or burning scalp | Irritation or fragrance sensitivity | Stop product and rinse scalp | Same day |
“Moisture overload” is often used for hair that feels limp, gummy, or difficult to style, but the symptom does not prove a specific biochemical imbalance. Clarifying may remove residue; a protein treatment may help some damaged fibers, yet repeated protein can make already-stiff hair feel harder.
What should you do if conditioner causes buildup?
Use less product, keep it away from the scalp, and rinse the underside of the hair deliberately. If residue persists, use a clarifying shampoo according to its label, then return to a smaller amount of regular conditioner.
Clarifying shampoos can increase dryness on bleached, curly, or fragile hair. They are a reset tool, not a requirement after every leave-in application.
Can conditioner repair split ends?
Conditioner can temporarily smooth and lubricate split ends, but it cannot fuse permanently separated keratin fibers. A trim is the only lasting way to remove a split, while conditioner reduces friction that may create further splitting.
That limitation matters when selecting a product. A bond-building or protein-containing treatment may improve the feel and strength of damaged hair, but cosmetic conditioning should not be described as permanent structural repair.
How often should you use conditioner?
Use rinse-out conditioner whenever the hair feels rough after cleansing, which may range from one to seven times weekly. A typical starting schedule is every shampoo for dry, curly, coarse, or colored hair, and every second shampoo for fine hair that becomes flat.
Wash frequency depends on scalp oil, exercise, climate, styling products, and texture. A fixed “2-4 times per week” rule is less useful than the hair’s response: reduce quantity when hair is limp, and increase coverage when ends remain rough.
What Does Conditioning Cost and How Long Does It Take?
A standard rinse-out routine costs approximately $5-$50 per bottle and takes 3-5 minutes, depending on product tier, hair length, and whether detangling is required. A 250-milliliter bottle may last roughly 4-12 weeks, but dense or long hair can use it faster than fine short hair.
| Routine | Product volume used | Typical time | Typical product cost |
|---|---|---|---|
| Fine, short hair | 1-3 milliliters per wash | 2-3 minutes | $5-$15 per bottle |
| Medium, shoulder-length hair | 4-8 milliliters per wash | 3-5 minutes | $5-$30 per bottle |
| Long, dense hair | 8-20 milliliters per wash | 5-10 minutes | $10-$50 per bottle |
| Weekly deep treatment | 10-30 milliliters per treatment | 10-30 minutes | $8-$45 per jar |
| Curly wash day with detangling | 10-25 milliliters per wash | 10-25 minutes | $10-$50 per bottle |
Use the open-jar symbol and manufacturer date guidance for expiration. Many cosmetic products carry a 12M or 24M period-after-opening symbol, but changes in smell, color, texture, or separation are reasons to discard conditioner sooner.
Expert Rules That Prevent Most Conditioning Errors
The following practitioner rules are more useful than memorizing a quarter-sized amount or insisting on cold water:
- Dose by surface area, not hair length alone. Shoulder-length hair with high density can require more conditioner than waist-length hair with low density.
- Place product where sebum is least available. The ends need conditioning more consistently than the roots because they have traveled farther through brushing, sunlight, heat, and chemical processing.
- Judge the wet result and the dry result separately. Hair that feels wonderfully slippery in the shower may dry flat if the formula is too rich.
- Change one variable at a time. Altering shampoo, conditioner, mask, oil, and styling cream together makes it impossible to identify the cause of buildup or dryness.
- Treat the label as the product’s operating specification. A scalp conditioner, co-wash, and deep mask should not be forced into the routine for a conventional rinse-out product.
Frequently Asked Questions
Can I apply conditioner before shampoo?
Yes, conditioner can be applied before shampoo as reverse washing, especially when fine hair becomes flat after conventional conditioning. Apply a small amount to the lengths, rinse lightly, shampoo the scalp, and rinse again. Reverse washing may remove too much softness from coarse, curly, or porous hair.
Can I use conditioner every day?
You can use conditioner every day if your hair is cleansed daily and the formula does not create greasiness, limpness, irritation, or buildup. Fine hair may need less product or conditioning every second wash, while coarse and curly hair often tolerates conditioning at every wash.
Should I condition before or after shampoo?
Condition after shampoo when the main goal is maximum softness and detangling. Shampoo first removes oil and residue, allowing the conditioner to deposit on a cleaner fiber. Condition before shampoo only when reducing weight or preserving volume is more important than maximum conditioning.
Is leaving conditioner in overnight harmful?
Leaving a rinse-out conditioner overnight is unnecessary and may cause residue, scalp irritation, or limp hair because the formula was designed for brief contact and rinsing. Use a labeled overnight treatment or leave-in product instead, and keep it away from the scalp unless the instructions say otherwise.
Why does my hair tangle after conditioning?
Hair may still tangle because conditioner was not distributed through all sections, the ends are split or highly porous, or the hair was brushed too aggressively. Apply enough product for slip, detangle from ends upward with fingers or a wide-tooth comb, and consider trimming persistent split ends.
Should I use protein or moisturizing conditioner?
Choose a moisturizing conditioner when hair feels dry, rough, or frizzy, and consider occasional protein when chemically damaged hair feels weak, overly stretchy, or unable to hold shape. Protein is not automatically better, and frequent use can make some hair feel stiff, so follow the product directions and reassess after several washes.
The Bottom Line
To apply hair conditioner correctly, rinse shampoo completely, squeeze out excess water, start with a measured amount, and smooth the product from the mid-lengths to the ends. Detangle gently, leave a rinse-out formula for about 2-3 minutes, and rinse until the hair feels clean and soft rather than coated. Adjust quantity and formula to density, texture, porosity, and scalp behavior.


