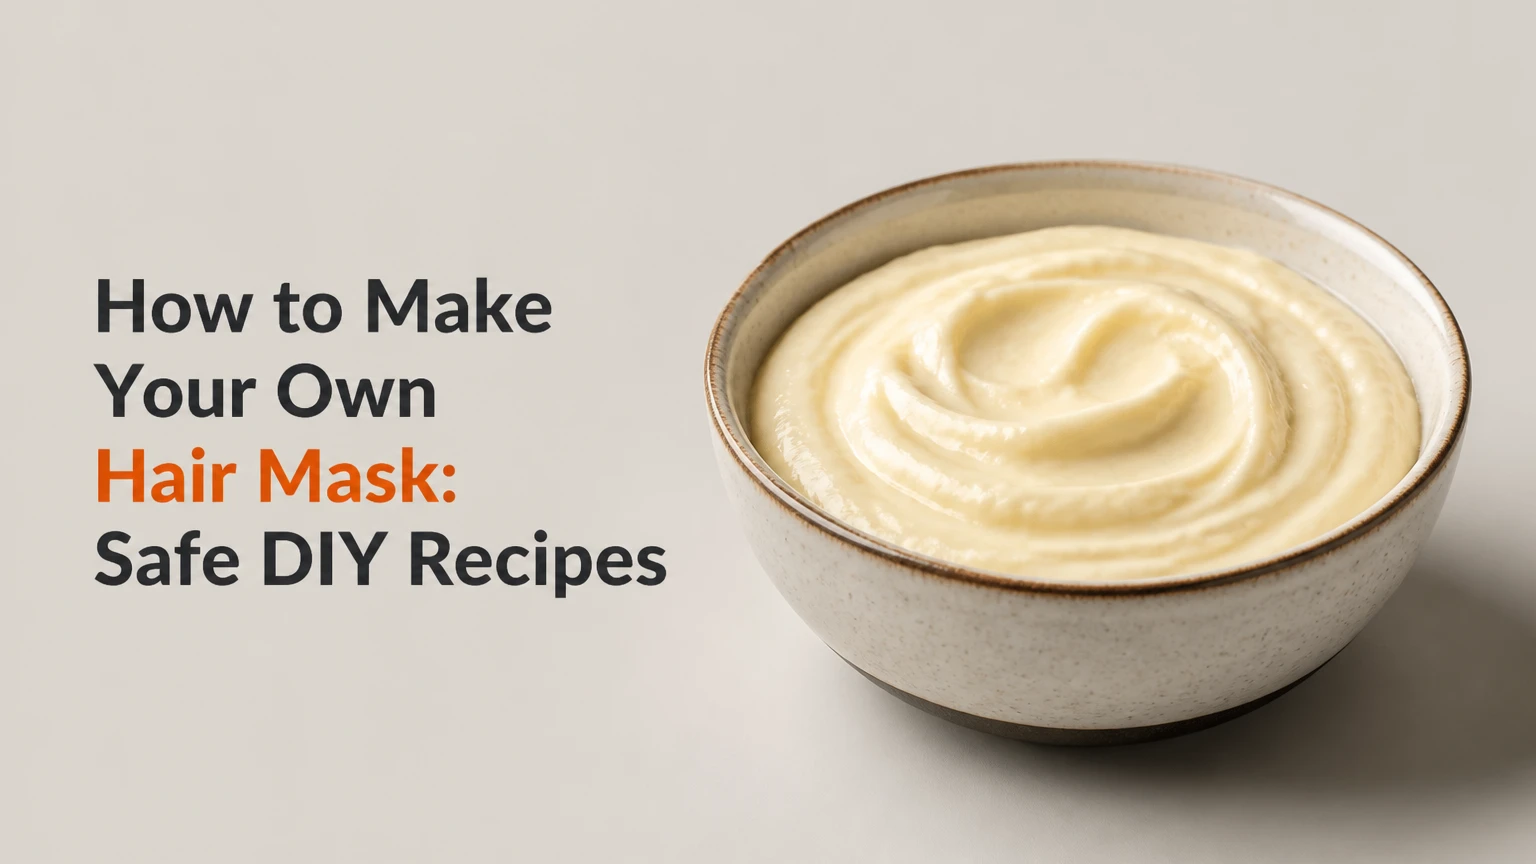
To make your own hair mask, blend a fresh conditioning base such as avocado, plain yogurt, aloe vera gel, or honey with a small amount of oil, apply it to damp mid-lengths and ends, leave it for 10-30 minutes, then rinse thoroughly and shampoo if needed. Choose ingredients according to hair texture, scalp condition, and buildup risk.
Key Facts at a Glance
A fresh DIY hair mask usually takes 5-10 minutes to prepare and should be used immediately.
Most homemade masks need 10-30 minutes of contact time; overnight use increases mess, irritation, and buildup without proven extra benefit.
A kitchen mask conditions and lubricates the hair surface, but it cannot permanently repair split ends or make follicles grow faster.
Apply oil-rich mixtures mainly from the ears downward, especially when the scalp is oily or sensitive.
Typical cost is about $1-$5 per batch, depending on avocado, yogurt, specialty oils, and local prices.
Patch-test botanical ingredients, essential oils, and acidic ingredients before applying them to the scalp.
What Can a DIY Hair Mask Do?
A DIY hair mask is a short-contact conditioning treatment made from fresh household ingredients. Its practical effects come from surface lubrication, water retention, temporary film formation, and reduced friction between hair fibers, rather than from repairing living tissue inside the hair.
Hair is a keratin fiber outside the scalp. Dermatologist Zoe Diana Draelos describes the hair shaft as “a nonliving structure composed of a protein called keratin.” That distinction matters: avocado or yogurt may make damaged hair feel smoother, but neither ingredient can fuse a split end or reverse chemical changes permanently.
A homemade mask is most useful when hair feels rough, dry, tangled, or frizzy after washing. It is less useful for sudden shedding, scalp infection, severe dandruff, or pattern hair loss, which require a medical or evidence-based treatment plan.
Which ingredients change the feel of hair?
Ingredient selection should match the desired cosmetic result. Humectants attract or hold water, oils reduce friction, and proteins can leave a temporary strengthening film, although protein-heavy mixtures may make some hair feel stiff.
| Ingredient | Main cosmetic role | Typical amount | Best placement |
|---|---|---|---|
| Plain Greek yogurt | Protein and emollient conditioning | 2-4 tbsp | Mid-lengths and ends |
| Ripe avocado | Fatty emollients and slip | 1/2 fruit | Dry, coarse lengths |
| Honey | Humectant and viscosity | 1-2 tsp | Mixed into a base |
| Aloe vera gel | Lightweight slip and water content | 1-3 tbsp | Fine or curly lengths |
| Jojoba oil | Light lubrication | 1 tsp | Ends and porous sections |
| Coconut oil | Heavy lubrication and pre-wash protection | 1 tsp | Coarse, non-protein-sensitive hair |
| Egg yolk | Lipids and protein | 1 yolk | Damaged lengths, occasional use |
| Apple cider vinegar | Acidic rinse ingredient | 1 tsp diluted | Rinse only, not a concentrated mask |
Raw lemon juice, undiluted vinegar, baking soda, garlic, and undiluted essential oils are poor default mask ingredients because acidity, alkalinity, or fragrance compounds can irritate skin and disrupt the hair surface. “Natural” describes origin, not safety.
Before You Start: Ingredients, Tools, and Cost
A basic homemade hair mask requires a bowl, spoon, blender or fine sieve, clips, an old towel, and enough water for complete rinsing. A 5-10 minute preparation window suits smooth recipes; fruit mixtures can take 10-15 minutes when straining is necessary.
| Requirement | Typical specification | Approximate quantity | Typical cost |
|---|---|---|---|
| Mixing bowl | 300-500 ml capacity | 1 | $0.50-$2 |
| Blender or mini processor | Smooth puree setting | 1 appliance | Existing kitchen tool |
| Base ingredient | Avocado, yogurt, or aloe | 1/2 cup maximum | $0.75-$3 |
| Conditioning additive | Honey or oil | 1-2 tsp | $0.10-$1 |
| Application tools | Clips and wide-tooth comb | 2-4 clips | $0-$5 |
| Covering material | Shower cap or reusable cap | 1 | $1-$8 |
| Total fresh batch | Enough for shoulder-length hair | 1 batch | $1-$5 |
Use a smaller batch for a pixie cut or fine hair. Thick, waist-length hair may need 1.5-2 times the quantities, but increasing oil proportionally often creates greasy residue. Add more yogurt, aloe, or water-based base instead of doubling heavy oil.
Do not store a food-based mask at room temperature. Refrigeration slows microbial growth but does not make a kitchen mixture shelf-stable, so discard leftovers after 24 hours and never return used product to the container.
Which Homemade Hair Mask Recipe Should You Choose?
The best homemade hair mask depends on the hair shaft and the desired finish, not on a universal “best” ingredient. Dry, coarse hair generally tolerates richer emollients, while fine or oily hair usually needs a smaller amount of oil and a shorter treatment.
| Hair concern | Formula for one batch | Contact time | Removal method |
|---|---|---|---|
| Dry or frizzy lengths | 1/2 avocado, 1 tsp honey, 1 tsp jojoba oil | 20 minutes | Lukewarm rinse, shampoo if oily |
| Damaged or brittle lengths | 3 tbsp plain Greek yogurt, 1 egg yolk, 1 tsp olive oil | 10-15 minutes | Cool-to-lukewarm rinse, shampoo |
| Fine or flat hair | 3 tbsp aloe gel, 1 tsp honey, 1/2 tsp jojoba oil | 10 minutes | Water rinse, light shampoo if coated |
| Curly hair needing slip | 1/4 cup yogurt, 2 tbsp aloe gel, 1 tsp argan oil | 15-20 minutes | Thorough lukewarm rinse |
| Dry scalp without open skin | 2 tbsp aloe gel, 1 tsp plain yogurt, no essential oil | 10 minutes | Gentle shampoo and rinse |
| Oily scalp with dry ends | 3 tbsp aloe gel, 1 tsp honey, 1/2 tsp jojoba oil | 10 minutes | Shampoo scalp, rinse lengths |
Blend avocado until completely smooth, then pass the mixture through a fine sieve if your hair is dense, curly, or difficult to detangle. Chunky banana and avocado particles can lodge around curls and require mechanical removal, which creates more friction than the mask is worth.
Recipe 1: Avocado and Honey for Dry Hair
Blend one-half ripe avocado with one teaspoon of honey and one teaspoon of jojoba oil. Apply the mixture to damp lengths, concentrating on rough ends, and leave it for 15-20 minutes before rinsing.
Avocado supplies a rich, slippery texture, while honey increases the water-attracting character of the mixture. Jojoba oil reduces friction but remains lighter than castor oil or a tablespoon of coconut oil. This formula is suitable for coarse, wavy, and curly hair that feels rough after shampooing.
Skip this recipe when hair is very fine, the scalp becomes oily quickly, or previous avocado masks left a waxy coating. Reduce the oil to one-half teaspoon for shoulder-length hair, and shampoo once if the rinse water does not remove the film.
Recipe 2: Yogurt and Egg for Damaged Hair
Mix three tablespoons of plain Greek yogurt with one egg yolk and one teaspoon of olive oil. Apply it to the lengths for 10-15 minutes, then rinse with cool or lukewarm water before shampooing lightly.
Yogurt and egg add protein-containing material that can temporarily improve the feel of porous, chemically treated hair. The effect is cosmetic and temporary, not structural reconstruction of the cortex. Hair that becomes rigid, rough, or straw-like after protein treatments should use a non-protein mask instead.
Use a fresh egg, keep the mixture away from broken skin, and wash hands and tools after application. Never use hot water because heat can coagulate egg proteins and make cleanup difficult.
How Do You Apply a Homemade Hair Mask?
Apply a homemade hair mask after shampooing or as a pre-shampoo treatment, depending on its oil content. The reliable sequence is to detangle, dampen rather than soak, section the hair, apply from the ends upward, process for 10-30 minutes, and rinse until the water runs clear.
The AI Overview recommends clarifying shampoo and heat to open the cuticle. That advice is too broad. Clarifying shampoo can remove buildup, but frequent use may increase dryness, and warm towels do not guarantee deeper ingredient penetration because hair cuticle behavior depends on fiber condition, temperature, water, and formulation.
Step 1: Choose the treatment position
Use an oil-rich mask before shampooing when hair is coarse or easily weighed down. Use a yogurt, aloe, or honey mask after shampooing when the main goal is slip and softness.
Check the scalp first. Do not apply a food mixture to eczema, scratches, infected follicles, or a recently irritated scalp.
Success checkpoint: the chosen formula matches the area needing treatment.
Common mistake: applying a heavy oil mask to an already oily root area.
Step 2: Wash and dampen the hair
Cleanse with a regular shampoo if the hair has light styling residue. Reserve clarifying shampoo for visible buildup, frequent dry shampoo use, or silicone-heavy styling routines, and avoid treating a dry scalp with clarifying shampoo every wash.
Squeeze out excess water until the hair is damp but not dripping. Excess water dilutes the mixture and makes it slide onto the floor.
Success checkpoint: hair separates into sections without water running down the neck.
Common mistake: applying the mask to fully dry hair, which requires more product and spreads unevenly.
Step 3: Section and apply from the ends upward
Divide the hair into four sections for medium or long hair. Apply a thin layer from the ends toward the mid-lengths, using a tint brush or fingers, and stop several centimeters below the roots unless the formula is specifically lightweight and the scalp tolerates it.
Use a wide-tooth comb once the product is distributed. Avoid aggressive brushing, because wet hair stretches more easily and damaged hair breaks under tension.
Success checkpoint: every targeted strand feels lightly coated rather than saturated.
Common mistake: piling the mixture onto the scalp, which can create grease, itching, and difficult rinsing.
Step 4: Cover without overheating
Twist the coated hair loosely and cover it with a shower cap. A warm, damp towel can keep the treatment comfortable and reduce drying, but it is optional; do not use a heated cap at a temperature that makes the scalp hot or uncomfortable.
Heat does not “force” a kitchen ingredient into the cortex. The main practical benefit of covering is preventing evaporation and keeping the mixture contained.
Success checkpoint: the mask remains moist and the scalp feels comfortable.
Common mistake: wrapping tightly or applying direct high heat.
Step 5: Process for the correct duration
Leave most DIY masks on for 10-20 minutes. A rich avocado or oil formula may reach 20-30 minutes, while egg, yogurt, acidic, and essential-oil formulas should remain shorter because extra time adds irritation or stiffness risk.
Do not sleep in a food-based mask. Overnight contact increases microbial, staining, tangling, and scalp-irritation concerns without reliable evidence of superior conditioning.
Success checkpoint: the hair feels lubricated, not hard, itchy, or tight.
Common mistake: assuming a longer treatment always produces deeper conditioning.
Step 6: Rinse and assess the finish
Rinse with cool or lukewarm water until no slippery residue remains. Use a small amount of shampoo on the scalp and oily areas when necessary, then apply a light conditioner only if the lengths still feel rough.
Egg-containing mixtures need cool-to-lukewarm water. Finish by blotting with a towel rather than rubbing, then detangle from the ends upward.
Success checkpoint: hair feels smooth but not coated after drying.
Common mistake: using hot water or skipping shampoo after a heavy oil mask.
How Often Should You Make Your Own Hair Mask?
Most people should use a homemade hair mask once every 7-14 days. Fine or oily hair may need treatment only every 2-4 weeks, while coarse, curly, bleached, or highly porous hair may tolerate weekly conditioning if the formula does not create buildup.
| Hair profile | Starting frequency | Maximum practical trial | Adjustment signal |
|---|---|---|---|
| Fine, straight hair | Every 14-21 days | Weekly | Flat, limp roots mean reduce oil |
| Oily scalp, dry ends | Every 10-14 days | Weekly on ends only | Greasy roots mean move application downward |
| Coarse or curly hair | Every 7-10 days | Weekly | Stiffness means reduce protein |
| Bleached or high-porosity hair | Every 7 days | 1-2 times weekly | Coating or dullness means clarify occasionally |
| Sensitive or eczema-prone scalp | Every 14-30 days | Based on tolerance | Burning or redness means stop scalp use |
Product buildup and moisture-related softness are different problems. Hair that feels limp, tacky, or difficult to style may need less product and more complete cleansing, not another mask.
What Changes for Low-Porosity, High-Porosity, or Fine Hair?
Low-porosity hair usually needs lighter formulas and less oil, while high-porosity hair often benefits from richer conditioning and occasional protein. Porosity tests are imperfect, so use behavior such as drying time, tangling, and buildup to guide adjustments rather than treating a float test as a diagnosis.
For low-porosity hair, choose aloe, diluted honey, yogurt in a small amount, or one-half teaspoon of jojoba oil. Avoid forcing the cuticle open with high heat. A warm towel may improve comfort, but a lighter formula and thorough rinsing matter more.
For high-porosity or bleached hair, use yogurt or a small amount of egg yolk once every 1-2 weeks, alternating with a protein-free moisturizing mask. Heavy shea butter can improve feel but may require shampoo to remove.
Fine hair needs the smallest total quantity. Apply two tablespoons of mask to shoulder-length hair, keep oil below one-half teaspoon, and avoid roots.
Can DIY Masks Treat Dandruff or Hair Growth?
DIY hair masks cannot reliably treat hair loss, accelerate follicle growth, cure dandruff, or eliminate scalp infection. Masks can soften the hair fiber and reduce breakage-related roughness, but persistent flaking, redness, pain, or shedding needs evaluation by a dermatologist.
Tea tree oil is not harmless because it is plant-derived. Concentrated essential oil can cause allergic contact dermatitis, and homemade dilution is inconsistent. Apple cider vinegar can sting irritated skin and should never be used undiluted on the scalp.
For dandruff, an anti-dandruff shampoo containing an established active ingredient, such as ketoconazole, selenium sulfide, or zinc pyrithione where available, is more appropriate than a food mask. Apply a homemade conditioner only to the lengths if the scalp is flaky and sensitive.
What can a hair mask realistically improve?
A DIY treatment can improve softness, detangling, shine, and temporary frizz control after one use. It cannot restore a split end, permanently change curl pattern, reverse bleach damage, or replace treatment for androgenetic alopecia, telogen effluvium, psoriasis, or seborrheic dermatitis.
A useful practitioner rule is to judge the result after the hair is fully dry and styled normally. Wet hair can feel unusually smooth because water and product temporarily reduce friction.
DIY Hair Mask Versus Commercial Conditioner
Commercial masks have an important technical advantage: preservation, controlled pH, standardized ingredients, and predictable viscosity. Homemade masks offer low cost and customization, but they are perishable, inconsistent, and more likely to leave particles or residue.
| Attribute | DIY kitchen mask | Commercial hair mask | Practical consequence |
|---|---|---|---|
| Shelf life | Use immediately, refrigerate leftovers up to 24 hours | Often 12-36 months unopened | Commercial product is safer for repeated storage |
| Batch cost | Typically $1-$5 | Typically $6-$40 | DIY costs less per application |
| pH control | Usually unknown, commonly variable | Formulated and tested by manufacturer | Commercial product is more predictable |
| Texture | Depends on blending and straining | Consistent across uses | DIY needs careful preparation |
| Preservatives | Usually absent | Broad-spectrum system commonly included | Food mixtures spoil faster |
| Fragrance and actives | Ingredient-dependent | May include silicones, cationic conditioners, or fragrance | Choose according to sensitivity and performance |
| Best use case | Fresh, low-cost occasional treatment | Reliable routine conditioning | Commercial products suit frequent use |
“Chemical-free” is not a meaningful advantage because avocado, water, proteins, oils, and acids are all chemicals. A commercial conditioner is not automatically better, but its controlled formula usually gives more consistent results and lower contamination risk.
Common Problems and How to Fix Them
| Problem after treatment | Likely cause | Immediate fix | Next-batch adjustment |
|---|---|---|---|
| Greasy, coated hair | Too much oil or incomplete rinsing | Shampoo scalp and lengths once | Cut oil by one-half |
| Sticky hair | Excess honey or residue | Rinse, then use gentle shampoo | Limit honey to 1 tsp |
| Fruit particles remain | Incomplete blending | Rinse, condition, and comb gently | Blend and strain through mesh |
| Hair feels stiff | Too much egg or yogurt protein | Use a protein-free conditioner | Shorten contact time |
| Burning or itching | Fragrance, acid, or essential-oil sensitivity | Rinse immediately with cool water | Stop the ingredient and patch-test |
| Hair looks dull | Buildup or rich formula | Wash thoroughly at next cleanse | Use aloe or yogurt instead of butter |
Stop immediately if a mask causes burning, swelling, hives, or persistent redness. A patch test on the inner arm 24 hours beforehand can identify some contact reactions, but it cannot guarantee scalp safety.
Safe Variations for Color-Treated and Curly Hair
Color-treated hair should use mild, low-acid formulas and lukewarm water. Avoid concentrated vinegar and lemon juice because acidic kitchen ingredients can sting the scalp, and frequent exposure may affect feel and color maintenance even when the exact result varies by dye system.
Curly hair benefits from slip and careful detangling more than from a large amount of oil. Use yogurt plus aloe, apply in sections, keep the curls wet enough to distribute the mixture, and rinse without rough scrubbing.
For heat-damaged ends, a pre-shampoo teaspoon of coconut oil may reduce the harsh feel of washing for some hair types. It is not universally suitable. Hair that becomes hard or coated with coconut oil should switch to jojoba or argan oil.
Expert Rules That Prevent Most DIY Mask Failures
- Treat the scalp and hair fiber as separate surfaces. Most conditioning masks belong on the lengths. Scalp treatment requires a reason, a tolerable formula, and clean application.
- Use less oil than social-media recipes recommend. One teaspoon can coat shoulder-length hair; one tablespoon often creates a cleansing problem, especially on fine strands.
- Smoothness is not proof of repair. A film can reduce friction immediately while the underlying bleach, heat, or mechanical damage remains.
- Alternate protein and non-protein formulas. If hair feels brittle after egg or yogurt, stop protein for several washes and use a lightweight conditioning treatment.
- The rinse test matters more than the ingredient list. If the hair needs repeated harsh shampooing to remove a mask, the formula is unsuitable even if the ingredients sound nourishing.
Frequently Asked Questions
Can I make a hair mask without avocado?
Yes. Combine three tablespoons of plain yogurt or aloe vera gel with one teaspoon of honey and one-half teaspoon of jojoba oil. Aloe is lighter for fine hair, while yogurt provides more body for coarse or damaged lengths. Use the mixture immediately, leave it for 10-15 minutes, and rinse thoroughly.
Should I put a homemade hair mask on my roots?
Usually, no. Apply most DIY masks from mid-lengths to ends because roots receive natural sebum and heavy mixtures can make them greasy or uncomfortable. A lightweight aloe-based formula may suit a dry scalp, but avoid applying any mask to broken, inflamed, or infected skin.
Can I use a hair mask after coloring my hair?
Use a mild, oil-light mask after the product’s recommended post-color rinse and avoid concentrated acids. Plain conditioner, aloe, or a small amount of yogurt may improve softness, while hot water, vigorous rubbing, and lemon or vinegar mixtures can increase irritation and roughness.
Is coconut oil good for every hair type?
No. Coconut oil can feel effective on coarse, dry hair but may make fine, low-porosity, or protein-sensitive hair stiff, greasy, or dull. Start with one-half to one teaspoon as a pre-shampoo treatment, keep it on the lengths, and discontinue it if shampooing does not restore a clean, flexible feel.
Can a homemade hair mask stop hair shedding?
No. A homemade hair mask may reduce friction and breakage, but it does not address follicle-level shedding. Sudden or persistent hair loss, widening part lines, bald patches, scalp pain, or heavy shedding after illness should be assessed by a qualified medical professional.
How do I know whether my mask worked?
Assess the hair after it has dried completely and after your usual styling routine. A suitable mask leaves the lengths easier to detangle, flexible, and less rough without sticky residue, flat roots, itching, or repeated shampooing. If the result is greasy or stiff, change the formula rather than extending the processing time.
The Bottom Line
To make your own hair mask safely, choose a smooth base, add no more than a teaspoon of heavy oil, apply the mixture to damp lengths, leave it for 10-30 minutes, and rinse thoroughly with lukewarm water. Use the treatment every 1-2 weeks, adjust for texture and scalp sensitivity, and remember that a DIY hair mask conditions damaged hair temporarily rather than repairing it permanently.


