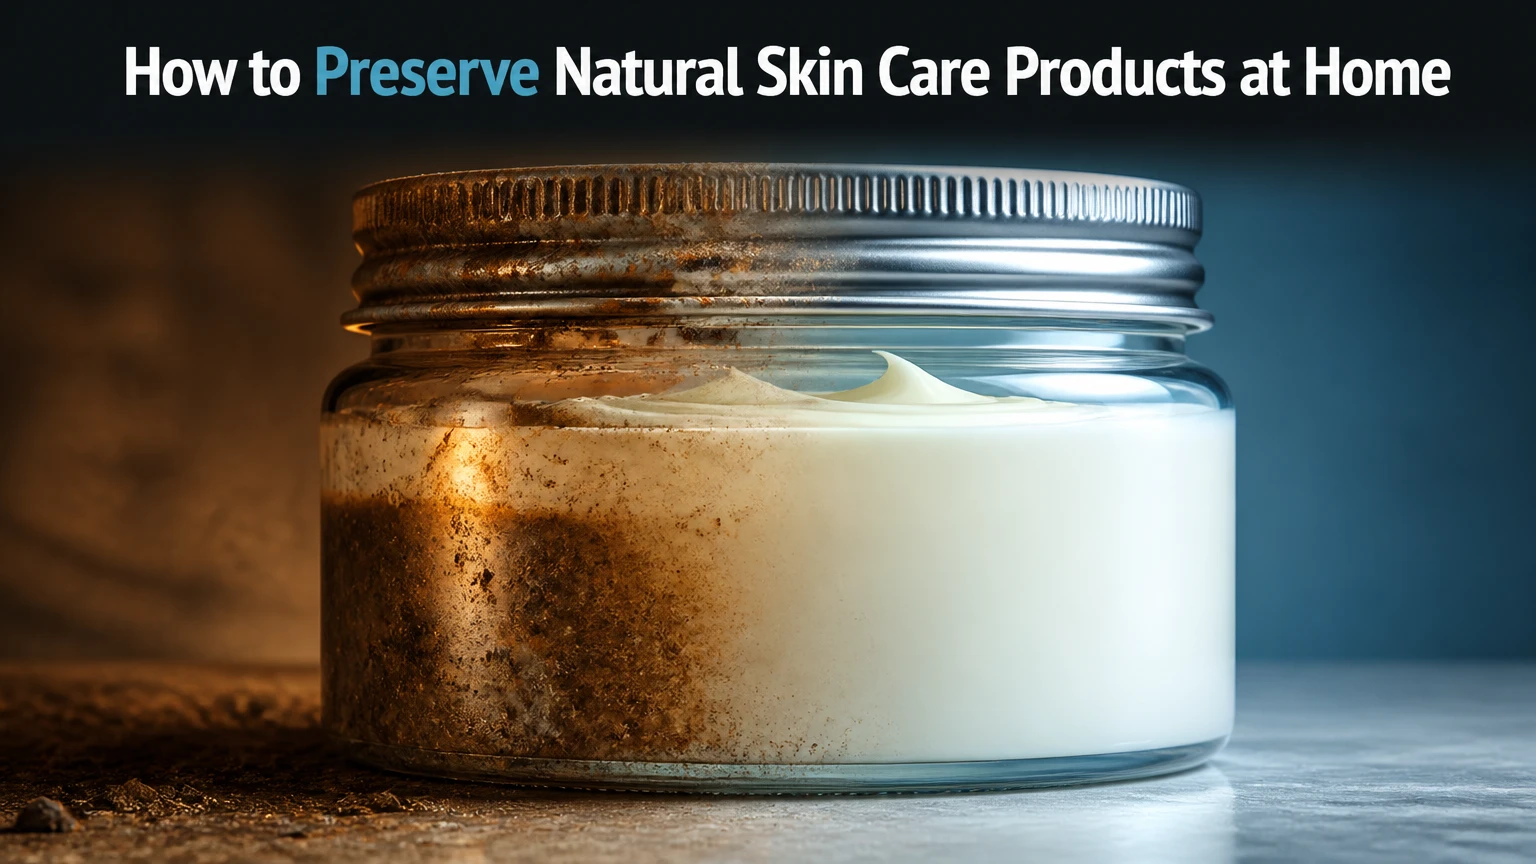
To preserve natural skin care products, classify the formula, sanitize equipment, weigh ingredients, heat compatible phases, cool below 40°C, add a tested preservative, adjust pH, and package safely. Allow 60-120 minutes, use laboratory-style care, and remember that preservative compatibility and microbial testing determine success.
Safety note: This process reduces contamination risk but does not prove a product is safe for sale or long-term use. Discard any batch with mold, gas, an unusual odor, unexplained color change, or separation. For commercial products, use a cosmetic chemist and an accredited laboratory for preservative efficacy and stability testing.
Before You Start
Gather the equipment and materials
Use a clean, dedicated work area with no pets, open windows, food, or unnecessary airflow. A 0.01 g scale matters because a 1% preservative rate in a 100 g batch equals only 1 g, and small weighing errors change the final concentration substantially.
| Item | Quantity or specification | Typical cost | Purpose |
|---|---|---|---|
| Digital scale | 1, accurate to 0.01 g | $15-$45 | Weighs the complete formula |
| Glass beakers | 2-3, heat-resistant | $10-$35 | Separates water and oil phases |
| pH meter | 1, calibratable, or pH strips | $15-$80 | Checks preservative operating range |
| Digital thermometer | 1, readable to 1°C | $8-$25 | Controls heating and cool-down |
| Stainless whisk or overhead stirrer | 1 | $8-$100 | Disperses ingredients evenly |
| Double boiler or water bath | 1 | $15-$40 | Provides controlled heating |
| 70% isopropyl alcohol | 100-250 mL | $3-$8 | Sanitizes hard surfaces and tools |
| Distilled or deionized water | As formula requires | $1-$3 | Avoids microbes and minerals in tap water |
| Broad-spectrum preservative | Supplier-recommended rate | $8-$25 | Controls bacteria, yeast, and mold |
| Tocopherol | 0.2%-0.5%, if oils need protection | $5-$15 | Slows oil oxidation |
| Airless bottle or amber container | 1 per finished batch | $2-$8 each | Limits air, light, and finger contact |
| Gloves, hair covering, paper towels | 1 set per batch | $3-$10 | Reduces handling contamination |
Confirm the prerequisites
Know how to calculate percentages, read a supplier technical data sheet, operate a scale, and measure temperature. You also need an emulsifier for an emulsion, a suitable solubilizer for some water-soluble and oil-soluble combinations, and a preservative compatible with the formula’s pH and phases.
The overview’s example rates are not universal recipes. Geogard ECT or Preservative ECO is often listed at 1.0%, Leucidal Liquid SF at 2.0%-4.0%, and Sharomix 705 at 0.6%-1.2%, but follow the current manufacturer’s documentation for your exact product. Some similarly named preservatives have different compositions.
For a 100 g batch, 1.0% equals 1.00 g, 0.5% equals 0.50 g, and 0.2% equals 0.20 g. For a 250 g batch, the same rates equal 2.50 g, 1.25 g, and 0.50 g.
Preservation Strategy and Formula Setup
Step 1: Classify the formula and select preservation
Classify the product as water-based, anhydrous, or water-activated, then choose a compatible preservation system before measuring ingredients.
A lotion, cream, toner, hydrosol, aloe gel, shampoo, or serum containing water needs broad-spectrum microbial preservation. An oil-only body oil, balm, salve, or whipped butter does not normally need a water-soluble preservative, but it can still become contaminated when wet fingers, shower water, or a damp spatula enters the jar.
Use an antioxidant such as tocopherol at a typical 0.2%-0.5% to slow oxidation in oils. It does not kill bacteria, yeast, or mold. Essential oils and grapefruit seed extract should not replace a validated preservative system; their antimicrobial activity is inconsistent at cosmetic use levels.
| Formula type | Main risk | Required approach | Suitable packaging |
|---|---|---|---|
| Toner or hydrosol | Bacteria, yeast, mold | Broad-spectrum preservative and pH control | Pump or spray bottle |
| Lotion or cream | Microbes plus emulsion instability | Preservative, emulsifier, pH control, testing | Airless pump |
| Oil serum | Oxidation and wet contamination | Tocopherol, dry handling, protective bottle | Dropper or pump |
| Balm | Oxidation and water introduced during use | Tocopherol and a dry formula | Tin or tube |
| Sugar scrub | Water introduced by wet hands | Preserve if water-containing or use dry scoop | Squeeze tube or pump |
You’ll know it worked when you have selected a preservative whose recommended rate, pH range, solubility, and addition temperature match the formula.
The common mistake is selecting a preservative because it is labeled “natural” without checking its technical sheet. “Natural” describes sourcing or marketing, not automatic broad-spectrum performance.
Step 2: Calculate the preservative and adjuster weights
Calculate every additive as a percentage of the final batch weight, and subtract additions from the water portion when the formula requires a fixed total.
Use this calculation:
ingredient weight = final batch weight × percentage ÷ 100
For a 100 g lotion using 1.0% preservative and 0.5% tocopherol, weigh 1.00 g preservative and 0.50 g tocopherol. If the original formula totals 100 g before those additions, remove 1.50 g from the water or another designated phase so the finished batch remains 100 g.
Prepare a 50% citric acid solution only if your formula requires pH reduction, using equal weights of citric acid and distilled water. For pH increases, use a 10% baking-soda solution, made from 10% baking soda and 90% distilled water, or use L-arginine according to its supplier instructions. Add adjusters dropwise because pH can change sharply.
You’ll know it worked when the written formula totals the intended finished weight and every additive has a recorded percentage.
The common mistake is adding preservative “by drops.” Drops vary by viscosity and nozzle size, so weigh it instead.
Clean Manufacture and Temperature Control
Step 3: Sanitize the workspace, tools, and container
Wash, dry, and sanitize every surface and item that will touch the product before opening ingredients.
Wash beakers, stirrers, spatulas, thermometer probes, scale platforms, and bottles with warm water and detergent. Rinse away all detergent and let them dry completely. Spray compatible hard surfaces and tools thoroughly with 70% isopropyl alcohol, then allow them to air-dry on clean paper towels. Do not wipe the alcohol off, because wiping can recontaminate the surface.
Wear clean gloves and cover your hair. Keep the room clean, dry, and free from pets. Alcohol is flammable, so keep it away from heating elements and flames. Follow the bottle’s safety instructions and provide ventilation.
This is sanitation, not sterilization. A home alcohol spray cannot verify that all microorganisms have been eliminated, and alcohol may not reach residue inside pumps or closures.
You’ll know it worked when tools are visibly clean, completely dry, alcohol has evaporated, and the bottle closure remains closed until filling.
The common mistake is sanitizing a wet or visibly dirty tool. Organic residue can shield microorganisms from disinfectant.
Step 4: Weigh and prepare the water and oil phases
Weigh the water phase and oil phase separately, then prepare each according to the formula’s emulsifier and heat requirements.
Place a clean beaker on the scale, tare it, and weigh each ingredient directly or into labeled vessels. Use distilled or deionized water, not tap, spring, or untreated filtered water. Record lot numbers and actual weights in a batch sheet.
For a conventional emulsion, heat the water and oil phases separately in a double boiler or water bath to approximately 70°C-75°C when the formula and emulsifier require hot processing. Hold the phases at that temperature for about 20 minutes only when your validated method specifies it. Combine them at the manufacturer’s recommended temperature and mix until the emulsion is uniform.
Heating does not replace preservation. It can reduce the initial microbial load, but contamination can occur during cooling, filling, and use.
You’ll know it worked when both phases reach the intended temperature, the formula weight is documented, and the combined emulsion has no obvious oil puddles or unmixed powder.
The common mistake is heating volatile extracts, essential oils, or heat-sensitive actives in the main phase. Reserve them for cool-down when their supplier requires it.
Step 5: Cool the product below the preservative’s addition temperature
Stir the emulsion gently while monitoring temperature until it reaches the preservative manufacturer’s specified addition point, commonly below 40°C.
Remove the beaker from the water bath and continue slow, steady mixing. Scrape the sides with a sanitized spatula so the center and edges cool evenly. Keep the beaker covered with a clean barrier when possible, but do not trap condensation above the product.
Many preservation systems are added during cool-down, but “below 40°C” is not a universal rule. Some systems tolerate higher temperatures, while others require a lower temperature. Use the exact technical sheet for the selected preservative.
Do not add the preservative to a hot mixture merely because the batch looks finished. Excess heat can reduce preservative performance or damage other ingredients.
You’ll know it worked when the thermometer reads below the product’s stated addition limit and the emulsion remains smooth while stirring.
The common mistake is measuring the beaker’s outside temperature instead of the product. Place the sanitized probe into the center without touching the bottom.
Step 6: Add the preservative and antioxidant
Weigh the preservative and tocopherol separately, add them below the specified temperature, and mix until evenly dispersed.
Tare a small sanitized vessel on the 0.01 g scale. Weigh the preservative at the selected supplier rate, then add it slowly to the batch while mixing. Add tocopherol at 0.2%-0.5% when oil oxidation is a concern, but confirm that it belongs in the oil phase or cool-down phase for your formula.
Mix gently but thoroughly for at least 2 minutes, or for the time specified by the preservative supplier. Scrape the beaker sides and bottom. If the preservative is oil-soluble or water-soluble, place it in the phase where it can distribute properly; use a compatible solubilizer when the documentation requires one.
You’ll know it worked when no preservative streaks, floating droplets, clumps, or undissolved crystals remain.
The common mistake is increasing the rate after a batch shows contamination. Never exceed the supplier’s maximum. A higher amount may irritate skin, destabilize the emulsion, or still fail if the system is incompatible.
pH, Filling, and Validation
Step 7: Measure pH, adjust carefully, and package
Measure the final pH, adjust it in tiny increments, then fill the finished product into a clean protective container.
Calibrate a pH meter with fresh buffer solutions according to its instructions, commonly pH 4.00 and 7.00. Rinse the probe with distilled water, gently blot it, and test a representative sample. For thick creams, use the method specified by the meter or formula supplier; some require a defined dilution with distilled water, while direct measurement can give misleading readings.
A practical skin-care target is often pH 4.5-5.5, but the preservative’s operating range controls. If pH is too high, add a small amount of 50% citric acid solution, mix thoroughly, wait briefly for equilibration, and retest. If it is too low, use a diluted baking-soda or L-arginine solution. Do not add concentrated powder directly to the finished product.
Fill immediately into an airless pump, pump bottle, tube, or dark amber container. Leave the closure closed until filling, then seal it promptly.
You’ll know it worked when the pH is stable in the preservative’s range, the container is sealed, and the final weight is close to the target.
The common mistake is taking one pH reading immediately after an adjuster addition. Mix, wait, and retest until two readings agree closely.
Step 8: Label, store, and validate the batch
Label the container with the batch date, formula version, preservative, pH, and storage instructions before placing it in a cool, dark location.
A homemade product may be labeled with a conservative provisional use period, such as 3-6 months, only as a practical risk-management estimate. That is not proof of shelf life. A preservative efficacy test, often called a challenge test, exposes the product to defined microorganisms and measures whether the system controls them. Stability testing checks changes in odor, color, pH, viscosity, separation, and packaging over time.
Store finished products away from sunlight, heaters, bathrooms with high humidity, and repeated temperature swings. Do not put fingers into a jar. Use a clean spatula and keep water out of anhydrous products.
| Validation check | When to perform it | Pass condition | Action if it fails |
|---|---|---|---|
| Appearance | Immediately and weekly | No unexpected separation or spots | Quarantine and investigate |
| Odor | Immediately and weekly | No sour, musty, rancid, or ammonia odor | Discard if unexplained |
| pH | Initial, then periodically | Remains in preservative range | Do not sell or use until assessed |
| Package function | At filling and during use | Pump, cap, and seal work correctly | Replace packaging |
| Microbial challenge test | Before assigning commercial shelf life | Passes laboratory criteria | Reformulate and retest |
| Stability test | Across intended storage period | Acceptable color, odor, texture, and pH | Shorten life or reformulate |
You’ll know it worked when the record identifies exactly what was made, when it was made, how it was preserved, and what tests support its use period.
The common mistake is writing “expires in six months” without testing. Treat that date as provisional for personal use, not as a validated commercial claim.
Preservative Choices and Operating Ranges
The following figures are typical examples from the supplied overview, not permission to ignore a current technical data sheet.
| Preservative or additive | Typical stated use level | Stated pH range in overview | Main limitation |
|---|---|---|---|
| Geogard ECT or Preservative ECO | 1.0% | 3.0-8.0 | Verify supplier’s exact composition and addition temperature |
| Leucidal Liquid SF | 2.0%-4.0% | 3.0-8.0 | Do not assume it alone passes broad-spectrum testing |
| Sharomix 705 | 0.6%-1.2% | Up to 5.5 | Fails as a choice when final pH is above its range |
| Tocopherol | 0.2%-0.5% | Not a preservative range | Protects oils from oxidation, not microbes |
| Citric acid solution | 50% acid, 50% water | Lowers pH | Add gradually and retest |
| Baking-soda solution | 10% soda, 90% water | Raises pH | Can destabilize some emulsions; add sparingly |
Common Mistakes and How to Fix Them
Mold or fuzzy spots appear
Discard the entire batch, including apparently clean portions. Mold can spread through a product before it becomes visible, so scraping the spot away is unsafe. Review sanitation, water quality, preservative rate, pH, packaging, and user handling. Do not automatically increase the preservative next time. First confirm the manufacturer’s maximum and assess compatibility.
The product smells sour, yeasty, or like ammonia
Discard it. Those odors can indicate bacterial or yeast growth even when the product looks normal. Check whether the final pH drifted, whether the preservative was added below its temperature limit, and whether the formula contains contamination-prone botanicals, proteins, or hydrosols.
Oil and water separate
Do not remix and sell or use the batch. Separation can expose unpreserved water pockets and may result from incorrect emulsifier level, phase temperature, mixing energy, electrolyte load, pH adjustment, or preservative incompatibility. Reformulate with the emulsifier supplier’s process and run stability checks before assigning a shelf life.
The product turns yellow or brown
Determine whether the change comes from oxidation, botanical color, heat damage, or light exposure. Compare the odor and pH with the original record. For oil oxidation, use fresh oils, limit headspace, add a permitted antioxidant, and choose amber or opaque packaging. Discard rancid-smelling material.
pH changes after filling
Recheck a representative sample with a calibrated meter and the same test method used initially. A drift may reflect incomplete mixing, ingredient interactions, microbial activity, or measurement differences. If the pH leaves the preservative’s operating range, quarantine the batch rather than correcting it blindly.
The pump clogs or the product becomes gritty
Inspect powder dispersion, wax crystallization, viscosity, and preservative solubility. A clogged pump may require a wider actuator or a thinner formula, while grit can result from cooling too quickly or adding a poorly dissolved ingredient. Do not dilute a finished product with water unless you reformulate and preserve it again.
Variations for Different Products and Conditions
For oil-only balms and body oils
Omit a water-phase preservative only when the formula is genuinely anhydrous and remains dry during use. Add tocopherol at a typical 0.2%-0.5% if compatible, use a pump or squeeze tube, and keep wet hands away from the product. A jar used in a shower is no longer a low-risk example because water repeatedly enters the container.
For a small beginner batch
Work with 50-100 g rather than a large batch, but keep the same weighing accuracy. At 50 g, a 1.0% preservative rate is 0.50 g, and a 0.5% tocopherol rate is 0.25 g. Small batches expose scale limitations, so use a scale that reads to 0.01 g and avoid measuring low amounts by volume.
If you have pH strips instead of a meter
Use narrow-range strips designed for the expected cosmetic range, preferably around pH 4-7. Test a small sample rather than dipping a used strip into the whole batch, because the strip can contaminate the product. Strips are less precise than a calibrated meter, so do not use them alone when the preservative has a narrow upper limit, such as pH 5.5.
If you cannot perform microbial testing
Make a small personal-use batch, use a pump container, store it cool and dark, and assign no confident commercial shelf life. Keep a batch record and inspect it regularly, but remember that appearance and odor cannot detect every pathogen. Commercial release requires documented preservation and stability evidence.
How Long Does It Take and What Does It Cost?
A simple oil serum may take 30-60 minutes. A heated lotion or cream commonly takes 60-120 minutes, including sanitation, heating, cooling, pH measurement, filling, and records. The first batch usually takes longer because weighing and pH adjustment require deliberate checks.
A basic home setup costs approximately $70-$250, depending mainly on whether you buy a pH meter, overhead stirrer, better packaging, and dedicated beakers. Consumables usually add $5-$25 per batch. Laboratory challenge and stability testing cost substantially more and vary by laboratory, formula, and test package.
| Setup | Typical time | Typical equipment cost | Appropriate use |
|---|---|---|---|
| Oil-only beginner batch | 30-60 minutes | $30-$100 | Personal balms and oils |
| Water-based beginner batch | 60-120 minutes | $70-$250 | Small personal lotions and toners |
| Small product development project | Several weeks for testing | $250+ plus lab fees | Formula refinement |
| Commercial launch | Testing-dependent | Varies widely | Requires documented safety and stability work |
Frequently Asked Questions
Is refrigeration enough to preserve homemade skin care?
No. Refrigeration can slow some microbial growth, but it does not replace a compatible broad-spectrum preservative in water-based products. Temperature changes and condensation can also introduce water during use. Refrigerate only when the formula specifically supports it, and follow the preservative supplier’s storage instructions.
Can vitamin E preserve a water-based lotion?
No. Tocopherol is an antioxidant that slows oxidation in oils. It does not reliably control bacteria, yeast, or mold in a lotion, toner, or cream. A water-containing formula needs a tested broad-spectrum preservation system, correct pH, clean processing, and packaging that limits contamination.
Can essential oils replace a cosmetic preservative?
No. Essential oils may inhibit some microorganisms in laboratory conditions, but their activity varies by oil, concentration, formula, and organism. The amount needed for reliable protection may irritate skin or create fragrance-allergy risks. Use them for scent or a defined cosmetic purpose, not as the sole preservation system.
Should I use a jar or an airless pump?
Choose an airless pump or squeeze container for most water-based products because it limits finger contact and air exchange. A jar requires repeated opening and often introduces wet fingers, which raises contamination risk. Packaging cannot rescue a poorly preserved formula, but it can reduce contamination during normal use.
What pH should natural skin care have?
Many leave-on products are formulated around pH 4.5-5.5, but there is no single correct pH for every product. The preservative, emulsifier, active ingredients, and skin-contact requirements determine the target. Use the preservative manufacturer’s effective range first, then confirm the formula remains suitable for its intended use.
Can I save a batch after adding too little preservative?
Do not guess or pour in extra preservative after the batch is finished. The preservative may not disperse correctly, and the revised concentration may exceed safe limits. If the product has not been filled, consult the supplier’s formulation guidance and recalculate. If contamination is suspected, discard it rather than attempting recovery.
Conclusion
Safe preservation depends on formula classification, clean processing, accurate weighing, controlled cool-down, compatible preservative selection, verified pH, protective packaging, and realistic testing. Use how to preserve natural skin care products as a process, not a single ingredient shortcut, and discard any batch that shows unexplained microbial or stability changes.


