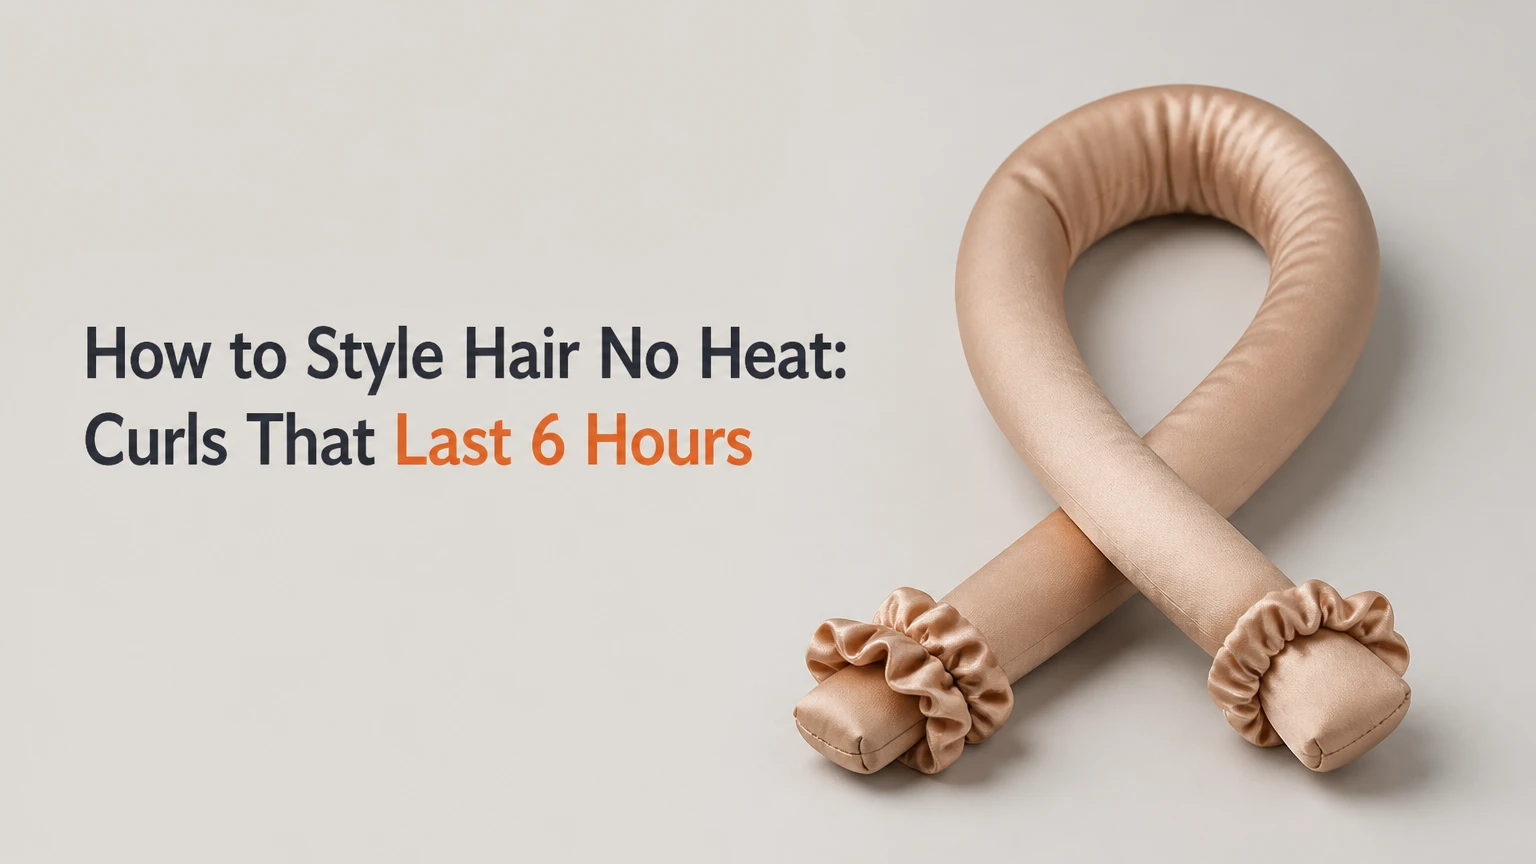
To style hair with no heat, begin with clean hair that is damp but mostly dry, apply a lightweight setting product, shape small smooth sections with braids, twists, rollers, or a satin ribbon, and leave the style until fully dry. The most important factor is complete drying before removal, because wet hair cannot retain its new shape.
Key Facts at a Glance
- Heatless styling reshapes temporary hydrogen bonds as damp hair dries around a fixed form.
- Typical setup takes 5-30 minutes, while overnight styles usually need 6-8 hours to set.
- Soaking-wet hair commonly produces flat roots, damp sections, scalp discomfort, and weak curl retention.
- Fine straight hair usually needs mousse and smaller sections; thick hair usually needs stronger tension and more drying time.
- Satin ribbons create loose curls, flexi rods create defined spirals, rollers create volume, and braids create uniform waves.
- A heatless style can still cause breakage when hair is pulled tightly, detangled roughly, or exposed to repeated friction.
What Does Heatless Hair Styling Mean?
Heatless hair styling changes the direction, volume, or pattern of hair without curling irons, straighteners, hot rollers, or a hot blow-dryer. Common methods include braiding, twisting, wrapping hair around a satin ribbon, setting flexi rods, placing Velcro rollers, and creating pin curls.
Hair contains keratin fibers joined by temporary hydrogen bonds. Water disrupts some of those bonds, while drying allows them to reform around the position created by the styling method. The result is temporary, not permanent, and gradually relaxes with humidity, brushing, washing, and natural movement.
The American Academy of Dermatology Association states that “hair is most fragile when it’s wet,” which explains why damp-hair styling requires gentle detangling and controlled tension. Heatless does not mean frictionless or damage-proof. Tight elastics, rough fabrics, repeated pulling, and sleeping on loose cotton can still create mechanical damage.
What Heatless Styling Cannot Do
Heatless methods cannot permanently straighten, relax, perm, or chemically alter the internal structure of hair. They also cannot reliably reproduce a high-temperature flat-iron finish on tightly coiled hair without stretching, wrapping, or setting the hair for longer periods.
Heatless curls are temporary and weather-sensitive. Fine, low-porosity hair may lose its shape within several hours, while coarse or porous hair may hold a bend longer but require more product to control surface frizz.
How Does Heatless Styling Work?
Heatless styling works by placing damp hair under controlled tension and allowing the hair to dry in that position. The tool or hairstyle supplies the shape, while drying time determines whether the temporary bonds reset strongly enough to preserve it.
Hair should be pliable enough to mold but dry enough to finish within the setting period. For most straight and wavy hair, that means approximately 70%-85% dry before installation. Curly and coily hair often needs more moisture for a twist-out or flexi-rod set, but the sections must still dry completely before takedown.
A practical dampness test is simple: squeeze one section with a microfiber towel. If water drips, the hair is too wet. If the section feels cool and flexible but does not leave moisture on the hand, it is usually ready. Roots deserve special attention because dense root areas remain wet after the lengths feel dry.
What Should You Apply Before Setting?
Use a lightweight mousse, foam, wave spray, setting lotion, or diluted leave-in conditioner according to the desired result. A typical starting amount is one golf-ball-sized portion of mousse for shoulder-length hair, or 1-2 teaspoons of lotion spread across several sections.
| Product type | Typical amount | Best result | Main risk |
|---|---|---|---|
| Volumizing mousse | 1 golf-ball portion | Fine-hair lift and flexible waves | Crunch or dryness if overapplied |
| Flexible setting lotion | 1-2 teaspoons | Defined curls with moderate hold | Sticky finish on low-density hair |
| Wave spray | 6-10 sprays | Loose texture and beach waves | Salt formulas can dry coarse hair |
| Lightweight curl cream | Pea to nickel size per section | Soft definition for curly hair | Weight and reduced volume |
| Leave-in conditioner | 1-2 teaspoons total | Moisture for dry or coily hair | Slow drying and weak hold |
Apply product from mid-lengths to ends first, then use the residue near the roots. Heavy product at the scalp increases drying time and can flatten volume.
Which Heatless Method Should You Choose?
The best heatless method depends on the result, hair length, density, and available setting time. A satin ribbon suits long hair and loose curls, while Velcro rollers suit short or fine hair that needs root lift rather than spiral definition.
| Method | Typical cost | Setup time | Setting time | Best match |
|---|---|---|---|---|
| Satin curling ribbon | $10-$25 | 5-10 minutes | 6-8 hours | Long, medium-to-thick hair |
| Flexi rods | $8-$15 per pack | 15-30 minutes | 4-8 hours | Defined curls and coily textures |
| Velcro rollers | $10-$20 | 10-15 minutes | 2-4 hours | Short, fine, or straight hair |
| Braids | $0 | 5-15 minutes | 6-8 hours | Uniform waves and crimped texture |
| Two-strand twists | $0 | 10-25 minutes | 6-10 hours | Curly, coily, and textured hair |
| Pin curls | $3-$12 for clips | 20-40 minutes | 6-8 hours | Vintage curls and short layers |
The satin ribbon creates a large-radius bend. Braids create repeated bends, so the finished texture is more uniform and less polished. Flexi rods provide the strongest control over curl diameter, but they take longer to install and can feel uncomfortable if too many rods are used.
Which Method Works Best for Each Hair Type?
Fine straight hair usually responds best to Velcro rollers or a narrow satin ribbon with volumizing mousse. Thick, coarse hair typically benefits from larger sections, a flexible cream, and a longer drying period. Curly and coily hair often gets better definition from twists or flexi rods than from a ribbon.
| Hair profile | Recommended method | Section size | Product approach | Typical result |
|---|---|---|---|---|
| Fine, straight, short | Velcro rollers | 1-2 inches | Volumizing mousse | Lift and soft bend |
| Fine, straight, long | Satin ribbon | 1-1.5 inches | Light mousse | Loose overnight curls |
| Thick, coarse, long | Satin ribbon or large rollers | 1.5-2.5 inches | Flexible cream | Smooth waves |
| Wavy, medium density | Braids or ribbon | 1-2 inches | Wave spray | Defined waves |
| Curly, shoulder length | Flexi rods | 0.5-1 inch | Curl cream and foam | Elongated curls |
| Coily, dense hair | Two-strand twists | 0.5-1 inch | Leave-in and setting foam | Stretch and definition |
How to Style Hair No Heat in Five Steps
The following process takes about 15-30 minutes to install and 4-10 hours to set, depending on the method and hair density. Complete drying determines the outcome more than the brand of tool.
Before You Start
| Requirement | Practical specification |
|---|---|
| Hair condition | Clean, detangled, damp, and 70%-85% dry |
| Installation time | 5-30 minutes |
| Setting time | 4-10 hours |
| Cost | $0 for braids, up to $25 for a satin ribbon |
| Basic tools | Wide-tooth comb, clips, microfiber towel, chosen setter |
| Finishing items | Lightweight oil or serum, optional hairspray |
| Overnight protection | Satin bonnet, scarf, or satin pillowcase |
Avoid installing a style on dripping-wet hair. Detangle from the ends upward, and use a wide-tooth comb on curly or coily hair to reduce snagging.
Step 1: Dry Hair to the Correct Dampness
Wash or lightly mist the hair, then remove excess water with a microfiber towel or cotton T-shirt. Allow the hair to air-dry until the lengths feel cool and flexible rather than wet, usually 70%-85% dry for straight or wavy hair.
You will know the hair is ready when no water transfers to your fingers during a gentle squeeze. The common mistake is styling immediately after washing, which leaves the center of wrapped sections wet long after the surface feels dry.
Step 2: Apply a Light Setting Product
Distribute mousse, foam, wave spray, or setting lotion evenly through the hair. Start with less than you think you need, because excess product makes sections take longer to dry and can leave fine hair stiff.
You will know product coverage is even when every section feels lightly coated without sticky patches. The common mistake is applying cream only to the ends, which leaves the middle lengths unable to hold the shape.
Step 3: Create Smooth, Controlled Sections
Divide the hair according to the method. Use 1-2-inch sections for loose waves, 0.5-1-inch sections for defined curls, and 2-3-inch sections for large volume. Comb each section smooth before wrapping, twisting, or rolling it.
You will know the section is controlled when the strands lie together without crossed hairs or visible tangles. The common mistake is using sections that vary widely in thickness, causing some pieces to dry quickly while others remain damp.
Step 4: Shape Hair With Even Tension
Wrap hair around the ribbon, place it on the roller, braid it, or twist it from roots to ends. Maintain firm, comfortable tension, but do not pull hard enough to create scalp pain or visible tension at the hairline.
You will know the shape is secure when the ends are tucked or fastened without loose loops. The common mistake is tightening the roots for extra hold, which can produce dents, headaches, traction, and flat crown volume.
Step 5: Leave the Style Until Completely Dry
Allow the hair to set for at least 4 hours with rollers or rods and 6-8 hours for most overnight braids, twists, or ribbon curls. Dense hair may need 8-10 hours, especially in humid rooms.
You will know the style is ready when the roots and the centers of the thickest sections feel fully dry, not cool or clammy. The common mistake is removing the tools because the outer surface feels dry while the interior remains damp.
Step 6: Unwrap, Separate, and Finish
Remove clips, rods, braids, or ribbon carefully, beginning at the ends and moving toward the roots. Do not brush immediately. Separate curls with clean fingers, then smooth one drop of lightweight oil or serum over the palms before touching the surface.
You will know the finish is balanced when the curls separate without turning fuzzy and the ends remain defined. The common mistake is applying oil directly to the hair, which creates concentrated greasy patches.
How Do You Create Different Looks Without Heat?
Heatless styling can produce waves, curls, volume, stretched texture, or a smoother shape by changing section size and the setting tool. Smaller sections create tighter patterns, larger sections create softer movement, and a flatter wrap creates a straighter result.
| Desired look | Method | Section pattern | Setting period | Finishing instruction |
|---|---|---|---|---|
| Loose waves | Large braid or satin ribbon | 1.5-2.5 inches | 6-8 hours | Finger-separate lightly |
| Defined curls | Flexi rods | 0.5-1 inch | 4-8 hours | Use a pea-size serum |
| Root volume | Velcro rollers | 2-3 inches | 2-4 hours | Lift roots before removal |
| Crimped texture | Three or four braids | 1-2 inches | 6-8 hours | Shake out, do not brush |
| Stretched curls | Large twists | 1-2 inches | 8-10 hours | Separate only after drying |
| Smooth shape | Hair wrapping | 2-3-inch panels | 6-8 hours | Comb edges gently |
For a robe-belt or satin-ribbon curl, place the ribbon over the crown, wrap each side away from the face, and secure the ends with soft scrunchies. For a braid-out, use two to six braids depending on the desired wave size. More braids create a tighter, more repetitive pattern.
How Can You Style Short Hair Without Heat?
Short hair usually needs smaller tools, smaller sections, or pin curls because long ribbons may not grip the ends. Velcro rollers, foam rollers, and flat pin curls provide better control for bobs, pixie grow-outs, and short layered cuts.
Keep sections approximately 0.5-1.5 inches wide. Roll the hair away from the face for lift, toward the face for a rounded vintage shape, or alternate directions for less uniform texture. Short ends can spring free, so use flat clips or small satin-covered elastics rather than tight rubber bands.
How Should You Style Curly or Coily Hair Without Heat?
Curly and coily hair should be detangled while damp, conditioned sufficiently, and divided into small sections before twisting or using flexi rods. A leave-in conditioner supplies slip, while foam or setting lotion helps the new shape remain defined after drying.
Do not stretch every curl with high tension. Excessive pulling can create breakage at fragile areas such as the temples, crown, and ends. Two-strand twists preserve more moisture and usually create a softer stretched pattern, while flexi rods create a more defined curl with greater installation time.
How Long Do Heatless Curls Last?
Heatless curls commonly last 6-24 hours on fine or straight hair and 1-3 days on some wavy, curly, or coily hair, although humidity, porosity, product hold, and brushing change the result. A style that lasts only one hour often was removed before the interior dried or was overloaded with conditioner.
| Variable | Typical range | Effect on longevity | Adjustment |
|---|---|---|---|
| Setting time | 4-10 hours | More dry time improves retention | Extend overnight |
| Humidity | 50%-80% relative humidity | Higher humidity relaxes waves | Add flexible hold |
| Section width | 0.5-3 inches | Smaller sections hold tighter | Match width to desired curl |
| Product hold | Light to medium | Medium hold lasts longer | Use mousse or foam |
| Hair density | Fine to very dense | Dense hair dries slowly | Reduce section thickness |
| Brushing after removal | 0-5 minutes | Immediate brushing loosens shape | Finger-separate first |
Hair with high porosity may absorb product quickly and become rough at the surface, while low-porosity hair may resist moisture and dry slowly. Neither porosity category guarantees a particular result, so a small test section is more reliable than a label.
Common Mistakes and How to Fix Them
Frizzy or unstructured results usually come from uneven section tension, rough detangling, insufficient hold, or removing the set while damp. Re-wet only the frizzy section lightly, smooth it with foam, reshape it, and allow it to dry fully instead of adding oil over the entire head.
The Style Falls Immediately
If curls collapse within minutes, check the roots and the thickest wrapped areas for coolness or moisture. Reinstall two or three test sections with less product and thinner sections. If those sections hold, the original problem was drying time or section size rather than the tool.
Roots Stay Damp
Damp roots result from installing too soon, wrapping dense sections, or covering the hair with a nonbreathable scarf. Dry the roots first, keep the sections thinner near the scalp, and use a loose satin bonnet that does not compress the crown.
Hair Looks Crimped Instead of Wavy
Crimping comes from narrow braids, sharply folded ends, or too many twists. Use two large braids instead of four or six, keep the braid pattern loose, and smooth the ends around a soft roller or ribbon.
Curls Look Uneven
Uneven curls usually indicate inconsistent section widths or alternating wrapping directions. Mark a repeatable pattern, such as one-inch sections wrapped away from the face, and compare the thickness of each section before installation.
The Scalp Hurts Overnight
Scalp pain means the installation is too tight, too heavy, or too close to the hairline. Remove the style, reduce tension, use fewer rods or larger sections, and avoid sleeping in any setup that causes pain, tingling, or persistent tenderness.
Hair Feels Dry or Rough
Dryness often follows salt spray overuse, insufficient conditioning, or friction from cotton bedding. Replace salt spray with mousse or a lightweight cream, apply conditioner during washing, and protect the finished style with satin.
Is Heatless Styling Safe for Damaged Hair?
Heatless styling is generally a lower-temperature alternative for damaged or color-treated hair, but it can still worsen breakage when wet strands are pulled tightly or repeatedly rubbed against fabric. Hair with bleach damage, split ends, or active shedding needs low tension, wide sections, soft fasteners, and infrequent manipulation.
A damaged-hair routine should use a wide-tooth comb, a conditioning leave-in, and a loose braid or large satin wrap. Avoid tight elastics, repeated daily restyling, aggressive brushing, and sleeping with wet hair enclosed against the scalp.
Heatless styling is not a repair treatment. It can reduce exposure to thermal tools, but it cannot reverse split ends or restore broken keratin fibers. A licensed cosmetologist or dermatologist should assess persistent breakage, scalp pain, sudden shedding, or patchy hair loss.
No-Tool Alternatives to Heatless Curling Tools
Braids and twists are the most accessible alternatives because they cost nothing and control texture through the hair’s own structure. A cotton T-shirt can remove excess water, while a robe belt, clean leggings, or soft scarf can replace a commercial curling ribbon when the fabric is smooth and wide enough.
Avoid rough terry towels, thin rubber bands, metal clips that snag, and narrow cords that concentrate pressure. A substitute works when it provides a smooth surface, stable shape, comfortable tension, and enough airflow for the hair to dry.
| Substitute | Typical cost | Suitable hair length | Result | Main limitation |
|---|---|---|---|---|
| Robe belt | $0-$10 | Shoulder length or longer | Loose curls | Bulky during sleep |
| Clean leggings | $5-$25 | Medium to long | Soft waves | Fabric may slip |
| Cotton T-shirt strips | $0-$10 | Short to long | Soft curls or rag curls | More setup time |
| Two large braids | $0 | Medium to long | Uniform waves | Visible braid pattern |
| Flat pin curls | $3-$12 | Short to medium | Structured curls | Requires many clips |
Time and Cost Planning
A no-heat style can cost nothing or approximately $8-$25 for a reusable ribbon or roller set. The main time cost is drying, not installation, so choosing a method that matches the available window prevents premature takedown.
| Scenario | Setup time | Drying or setting time | Typical cost | Practical choice |
|---|---|---|---|---|
| Morning volume | 10-15 minutes | 2-4 hours | $10-$20 | Velcro rollers |
| Overnight loose curls | 5-10 minutes | 6-8 hours | $10-$25 | Satin ribbon |
| Fast textured waves | 5-10 minutes | 4-6 hours | $0 | Two braids |
| Defined natural curls | 20-30 minutes | 6-10 hours | $8-$15 | Flexi rods |
| Stretching coily hair | 15-25 minutes | 8-10 hours | $0 | Large twists |
| Vintage short-hair set | 20-40 minutes | 6-8 hours | $3-$12 | Pin curls |
The Bottom Line
To style hair no heat successfully, prepare hair to the correct dampness, use even sections, maintain comfortable tension, and wait until every section is completely dry before removing the set. Choose ribbons for loose long-hair curls, rollers for volume, flexi rods for definition, and braids or twists for low-cost texture.
Heatless styling reduces thermal exposure, but it does not eliminate mechanical damage or humidity-related failure. A small test section, soft fastening, and realistic drying time produce more reliable results than tighter wrapping or heavier product.
Frequently Asked Questions
Can You Do Heatless Styling on Completely Wet Hair?
Completely wet hair is usually unsuitable for overnight heatless styling because wrapped sections dry slowly and may remain damp at the roots. Use hair that is approximately 70%-85% dry for straight or wavy textures, while curly and coily hair can remain wetter for some sets if each section still dries fully before removal.
Should You Use Oil Before Heatless Curls?
Use oil after removing heatless curls rather than before installation in most cases. Oil can reduce friction, but applying too much before setting may make fine hair slippery and weaken product hold. Start with one drop spread over both palms, then touch only the ends and surface.
Can Heatless Curls Straighten Hair?
Heatless wrapping, large rollers, and loose twists can temporarily stretch waves or curls, but they cannot permanently straighten hair. The result lasts until moisture, washing, humidity, or natural reversion restores the original pattern. Low-tension wrapping is safer than pulling the hair tightly around a hard tool.
How Often Can You Do Heatless Hairstyles?
Many people can use loose heatless hairstyles several times weekly if the hair remains flexible and the scalp stays comfortable. Daily tight installation can create friction and traction, particularly around the hairline. Alternate methods, use satin protection, and stop when breakage, soreness, or increased shedding appears.
Why Do Heatless Curls Work on One Side Better?
One side may hold better because of different section sizes, wrapping direction, hair density, growth pattern, or sleeping position. Use a mirror or divide both sides into matching sections, wrap each side away from the face, and keep the tool centered at the same height.
Is a Satin Ribbon Better Than a Robe Belt?
A satin ribbon is usually smoother, lighter, and easier to secure than a robe belt, while a robe belt is a low-cost substitute for medium or long hair. The ribbon generally creates less friction, but the robe belt can produce a similar loose curl when covered with a smooth fabric layer.


