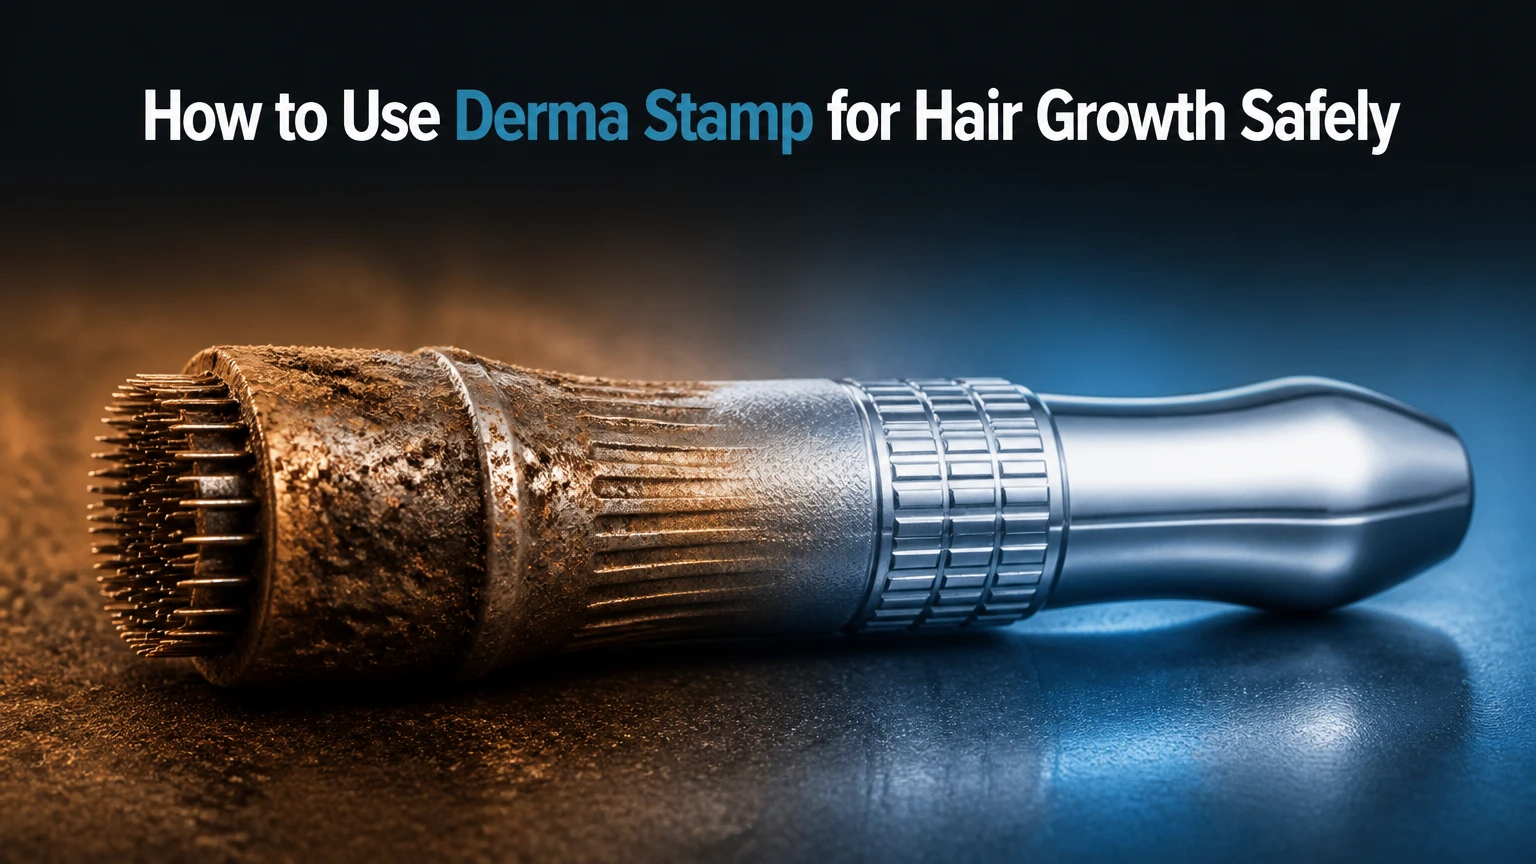
A derma stamp for hair growth is used by pressing sterile, short needles vertically into selected scalp areas rather than dragging across them. For home use, wash and dry the scalp, disinfect the device according to its manufacturer’s instructions, use conservative depth and pressure, allow the scalp to recover, and delay minoxidil until irritation has settled, commonly 24 hours.
Key Facts at a Glance
- A derma stamp creates controlled punctures through vertical pressure; it does not inject a growth serum into hair follicles.
- Home microneedling is an adjunct, not a proven replacement for diagnosing and treating the cause of hair loss.
- A fixed 0.5 mm device is a conservative starting point for many adults, but needle length does not determine safety by itself.
- Visible improvement, when it occurs, usually requires at least 3-6 months and may depend more on the underlying diagnosis and concurrent treatment.
- Minoxidil applied immediately after needling can cause more burning and may increase absorption; waiting 24 hours is a cautious home-use rule.
- Pain, pus, spreading redness, fever, persistent bleeding, or patchy worsening hair loss requires medical assessment.
What Does a Derma Stamp Do?
A derma stamp is a handheld microneedling instrument with a small head of fine needles that moves straight into and out of the scalp. The intended biological response includes temporary inflammation, wound-healing signaling, and possible remodeling around follicles, but the exact hair-growth mechanism remains under study.
The strongest clinical rationale concerns androgenetic alopecia, also called pattern hair loss. In a randomized study published in International Journal of Trichology in 2013, Dhurat and colleagues studied weekly microneedling combined with 5% minoxidil in men with androgenetic alopecia and reported greater hair-count improvement after 12 weeks than with minoxidil alone. That result supports microneedling as a possible adjunct, not as proof that every derma stamp or every depth will work.
Microneedling cannot revive a follicle destroyed by scarring disease. A stamp also cannot correct iron deficiency, thyroid disease, medication-related shedding, or alopecia areata. Diagnosis comes first when hair loss is sudden, patchy, painful, inflamed, or accompanied by scalp scaling.
Before You Start
Prepare the device, scalp, and treatment area before opening the stamp. The first session should take about 15-25 minutes, excluding hair washing, and should cost approximately $10-$60 for a reusable device plus cleaning supplies, depending on region and device quality.
| Requirement | Typical specification | Why it matters |
|---|---|---|
| Device | Fixed 0.5 mm stamp | Limits depth-selection errors |
| Disinfectant | 70% isopropyl alcohol, if manufacturer permits | Reduces surface contamination |
| Contact time | Manufacturer label, often 5-10 minutes | Alcohol must contact needle surfaces |
| Scalp condition | Clean, dry, intact skin | Wet or damaged skin increases irritation |
| Session frequency | Usually once weekly initially | Allows inflammation to resolve |
| Treatment area | Hairline, crown, or thinning zones | Prevents unnecessary trauma |
Do not stamp over cuts, pustules, active folliculitis, sunburn, eczema, psoriasis flares, or suspected fungal infection. The American Academy of Dermatology Association recommends medical evaluation for sudden or patchy loss because several treatable disorders can resemble pattern hair loss.
Do not share a stamp. Do not use a device with bent, rusty, loose, or visibly contaminated needles. If the product has no cleaning instructions, no protective case, or no clear needle length, replacing it is safer than improvising.
How to Use a Derma Stamp for Hair Growth
Use a derma stamp once per treatment session, moving in small sections with light vertical pressure and no dragging. The practical sequence is preparation, disinfection, sectioning, stamping, recovery, and delayed topical treatment, with the scalp remaining mildly pink rather than significantly painful or bleeding.
Step 1: Wash and Dry the Scalp
Wash the scalp with a mild shampoo, rinse thoroughly, and let it dry completely before stamping. Remove styling products, oils, dry shampoo, sweat, and loose scale because these materials can increase friction and contamination.
Avoid aggressive exfoliating shampoos immediately before needling. A clean scalp is the goal, not a scrubbed or chemically irritated scalp.
Success checkpoint: The scalp feels clean and dry, with no open areas or active rash.
Common mistake: Stamping after applying hair fibers, pomade, oil, or leave-in treatment.
Step 2: Disinfect the Derma Stamp
Clean visible residue first if the manufacturer permits mild soap and water, then disinfect the needle head using the product’s stated method. Many manufacturers recommend 70% isopropyl alcohol, but a home alcohol soak does not equal clinical sterilization and should not be treated as a guarantee against infection.
If alcohol is allowed, fully wet the needle head for the labeled contact time, commonly 5-10 minutes, then place the stamp on a clean surface and let it air-dry completely. Never use a flame, microwave, boiling water, or household bleach unless the manufacturer specifically provides a validated protocol.
Success checkpoint: The head is visibly clean, dry, and undamaged before contact with skin.
Common mistake: Touching the needles after disinfection or wiping them with a used towel.
Step 3: Divide the Thinning Area
Part the hair into narrow sections so the needles contact scalp rather than hair shafts. Work from front to back or divide the scalp into four zones, such as frontal hairline, left temple, right temple, and crown.
Long or dense hair makes a stamp more useful than a roller because the device can be placed through a part without rolling strands into the mechanism. Keep treated and untreated sections visibly separate.
Success checkpoint: Each planned zone has exposed scalp and a defined boundary.
Common mistake: Repeatedly treating the same visible part while missing surrounding thinning areas.
Step 4: Stamp Vertically With Light Pressure
Hold the device like a pen, place it flat against the scalp, press straight down, and lift straight up. Do not drag, twist, or rock the stamp because lateral movement can create unnecessary tearing and hair pulling.
Use enough pressure to produce a brief prickling sensation and mild, even pinkness. A small pinpoint of blood can occur with deeper professional microneedling, but deliberate bleeding is not a useful home target. Ten to fifteen light placements per small zone, or one to two controlled passes across a section, is a conservative starting approach. More passes do not automatically produce more growth.
Success checkpoint: The scalp is mildly pink without severe pain, pooling blood, or persistent bleeding.
Common mistake: Pressing harder to compensate for a short needle or assuming pain indicates effectiveness.
Step 5: Treat Every Zone Once
Lift the stamp fully between placements and move systematically across the exposed scalp. A horizontal and vertical pattern can improve coverage, but repeated criss-crossing is unnecessary when the stamp already contacts each area evenly.
Avoid stamping moles, raised lesions, scars of unknown cause, or areas with active inflammation. Stop if the scalp becomes hot, sharply painful, or increasingly red during the session.
Success checkpoint: The entire target region has received consistent contact, with no heavily overworked spots.
Common mistake: Continuing until the scalp is uniformly bloody or swollen.
Step 6: Clean the Device Again
After the session, remove residue using the manufacturer’s cleaning instructions, disinfect the needle head, and allow it to dry before replacing its protective cap. Store the device in a closed, clean container away from bathroom spray, dust, and shared grooming tools.
A stamp that cannot be cleaned reliably should not be reused. Replace it when needles bend, the head loosens, corrosion appears, or the manufacturer’s use limit is reached.
Success checkpoint: The device is dry, capped, and stored separately from razors and combs.
Common mistake: Returning a wet stamp to its case, which creates a humid environment for contamination.
Step 7: Resume Topical Products Carefully
Do not apply minoxidil, retinoids, essential oils, acids, alcohol-based tonics, or fragranced scalp products immediately after stamping. A cautious home rule is to wait 24 hours before restarting minoxidil, particularly after deeper needling or noticeable irritation.
Cosmetic serums are different from medicines, but “natural” does not mean non-irritating. Apply a product only when the scalp feels calm, and follow its label or prescriber’s directions rather than using the punctures to force absorption.
Success checkpoint: The scalp has no burning, active bleeding, or increasing redness before topical treatment resumes.
Common mistake: Applying minoxidil immediately because a punctured scalp seems likely to absorb it better.
Which Needle Depth Should You Use?
For unsupervised home use, 0.25-0.5 mm is the conservative range, while 1.0-1.5 mm should generally be reserved for trained clinical use or a dermatologist-directed protocol. Research has used different depths and schedules, so claims that exactly 0.6 mm is universally superior are not established clinical rules.
Needle length describes penetration distance, not treatment quality. Pressure, skin thickness, device design, sterility, treatment frequency, and the diagnosis of hair loss all change the result.
| Needle length | Typical purpose | Conservative home interpretation | Recovery expectation |
|---|---|---|---|
| 0.25 mm | Surface stimulation and product-contact studies | Lowest-depth option, limited evidence for regrowth | About 12-24 hours |
| 0.5 mm | Beginner scalp stamping | Reasonable starting point for intact scalp | About 24-48 hours |
| 1.0 mm | Deeper microneedling protocols | Prefer clinician guidance | About 48-72 hours |
| 1.5 mm | Research or professional treatment | Not a casual home setting | Several days |
| 2.0-3.0 mm | Deep procedural needling | Avoid at home | Medical supervision required |
The Dhurat 2013 trial used a 1.5 mm roller weekly under a defined research protocol. That finding should not be converted into an instruction for every consumer to use 1.5 mm at home, because a clinical study includes participant selection, monitoring, and controlled technique.
How Often Can You Stamp?
Start with once every seven days at most, and allow longer recovery if redness, tenderness, scaling, or burning persists. Twice-weekly use may be tolerated with very shallow devices by some people, but more frequent treatment has not been proven to produce faster growth and can maintain inflammation.
A practical schedule uses the scalp’s response rather than a rigid calendar.
| Scalp response after session | Next session | Action |
|---|---|---|
| Calm within 12 hours | 7 days later | Continue the same depth |
| Pink or tender for 24-48 hours | After full recovery | Keep weekly frequency |
| Burning or scaling for 3-5 days | Pause 1-2 weeks | Reduce pressure or seek advice |
| Persistent redness beyond 5 days | No next session | Contact a clinician |
| Pus, fever, spreading redness | Stop immediately | Seek prompt medical care |
When Should You Apply Minoxidil?
Wait approximately 24 hours after scalp stamping before applying minoxidil unless a prescribing clinician gives different instructions. The punctures can increase stinging and may alter topical absorption, while immediate application provides no established guarantee of superior follicle stimulation.
Apply minoxidil only at the labeled dose and frequency. Do not double the next dose after skipping treatment, and do not use oral minoxidil in place of topical minoxidil without medical supervision. The American Academy of Dermatology Association lists minoxidil as an established treatment option for some forms of pattern hair loss, but response depends on diagnosis, adherence, and duration.
| Product | Same-day use after stamping? | Conservative restart point |
|---|---|---|
| 5% topical minoxidil foam | Avoid if scalp is punctured or burning | About 24 hours |
| 5% topical minoxidil solution | Avoid, especially with alcohol or propylene glycol | About 24 hours |
| Fragranced serum | Avoid | When scalp is fully calm |
| Essential oil blend | Avoid | Not required for treatment |
| Plain shampoo | Rinse only, if needed | Next normal wash |
Derma Stamp Versus Derma Roller
A derma stamp is usually the more controllable home tool for a localized thinning area or longer hair, while a derma roller can cover a broad, closely cropped scalp faster. Neither tool has a universal superiority claim, and both can injure skin when used too deeply or too often.
| Criterion | Derma stamp | Derma roller | Practical winner |
|---|---|---|---|
| Movement | Vertical placement | Rolling arc | Stamp for control |
| Hair tangling | Low | Moderate to high | Stamp for long hair |
| Depth consistency | More consistent | Changes through arc | Stamp |
| Large-area speed | Slower | Faster | Roller |
| Hairline precision | High | Moderate | Stamp |
| Main mechanical risk | Excess pressure | Dragging and pulling | Depends on technique |
A roller is not automatically unsafe. The key difference is that a roller enters and exits at changing angles, so poor technique can tug hair or create more surface abrasion. A stamp reduces that specific risk but does not remove contamination, pressure, or over-treatment risks.
What Device Features Matter?
Choose a device with a fixed, clearly labeled needle length, a protective case, intact needle construction, and cleaning instructions that match the material. Medical-grade stainless steel and titanium are common materials, but material alone cannot verify sterility, sharpness, or manufacturing quality.
| Feature | Preferred specification | Red flag |
|---|---|---|
| Needle length | Fixed 0.5 mm for beginners | Unlabeled depth |
| Needle head | Stable, flush-mounted needles | Loose or tilted needles |
| Material | Stainless steel or titanium | Rust, discoloration, residue |
| Packaging | Sealed retail packaging | Opened or visibly handled |
| Cleaning guidance | Written manufacturer protocol | No disinfection instructions |
| Storage | Fitted protective cap | Loose needles in a bag |
Adjustable devices can create inconsistent results when users change depth without understanding tissue response. A 3.0 mm setting is not a sensible beginner upgrade; it approaches procedural needling and increases the chance of bleeding, scarring, and infection.
What Results Can You Expect?
Visible hair-density change, when microneedling helps, usually takes 3-6 months of consistent treatment and an effective primary hair-loss plan. Short-term redness or mild tenderness can occur after a session, but early shedding is not proof that new growth will follow.
Hair grows in cycles, so a two-week mirror check cannot measure meaningful regrowth. Use standardized photographs every four weeks under the same lighting, angle, hairstyle, and hair length. Track hair count only if the measurement method remains consistent.
| Time after starting | What may occur | Interpretation |
|---|---|---|
| 0-2 days | Pinkness, tenderness, mild tightness | Expected if steadily improving |
| 1-4 weeks | No visible density change | Too early to judge |
| 6-12 weeks | Reduced breakage or subtle texture change | Possible early response |
| 3-6 months | More noticeable density in responders | Compare standardized photos |
| 6-12 months | Better point for treatment review | Reassess diagnosis and plan |
Microneedling is not effective for every cause of hair loss. A dermatologist may examine the scalp, perform a hair-pull test, order blood tests, or recommend biopsy when scarring or inflammatory disease is suspected.
Who Should Avoid Scalp Stamping?
Avoid home scalp microneedling with active infection, uncontrolled inflammatory scalp disease, poor wound healing, or a tendency toward abnormal scarring. People taking anticoagulants, using isotretinoin, receiving chemotherapy, or managing immune suppression should ask a clinician before considering the procedure.
| Situation | Home stamping decision | Reason |
|---|---|---|
| Active dandruff with redness | Pause | Inflammation may worsen |
| Folliculitis or scalp pimples | Avoid | Can spread infection |
| Alopecia areata patches | Medical review first | Treatment requires diagnosis |
| Suspected scarring alopecia | Do not self-treat | Lost follicles may be permanent |
| Diabetes with poor wound healing | Clinician advice | Higher complication risk |
| Keloid tendency | Avoid unless cleared | Abnormal scar risk |
Stop and seek medical care for spreading redness, warmth, pus, fever, severe swelling, worsening pain, facial swelling, or bleeding that does not stop with gentle pressure. Hair loss accompanied by shiny scalp, burning, or loss of follicle openings deserves prompt evaluation because scarring alopecia can progress permanently.
Common Mistakes and How to Fix Them
Using Too Much Pressure
Heavy pressure creates unnecessary trauma without proving better stimulation. Reduce force until the scalp develops mild, even pinkness rather than significant pain or bleeding.
Treating Every Day
Daily stamping prevents the skin barrier from recovering. Stop until the scalp is normal, then restart no more than weekly with a shallower depth.
Applying Minoxidil Immediately
Freshly needled skin can sting intensely when exposed to minoxidil solvents. Wait about 24 hours, then resume the prescribed schedule if the scalp is calm.
Stamping Over Dandruff or Pimples
Needling an inflamed scalp can worsen irritation and distribute organisms across nearby skin. Treat the scalp condition first and obtain a diagnosis when inflammation persists.
Using a Dirty Device
A capped device is not necessarily clean. Follow the cleaning protocol before and after every session, never share the stamp, and replace it when the needles become damaged.
Chasing Bleeding
Bleeding is not a success metric. Stop the session, apply gentle pressure with clean gauze, and seek care if bleeding continues or recurs unusually easily.
How Should You Adapt the Technique?
Different hair lengths and scalp conditions require technique changes, not deeper needles. The safest adaptation is better sectioning and lower mechanical friction.
| User situation | Adjustment | Avoid |
|---|---|---|
| Long, dense hair | Use narrow parts and a stamp | Rolling through loose hair |
| Curly or coiled hair | Detangle gently and work in small zones | Pulling curls under the head |
| Sensitive scalp | Start at 0.25 mm or 0.5 mm | Fragrance and essential oils |
| Crown thinning | Use a mirror and marked zones | Repeating one visible part |
| Shaved scalp | Stamp small grids | Assuming a roller requires no cleaning |
Do not shave solely to make treatment easier. A clean part exposes the target without changing the underlying biology.
Cost, Replacement, and Maintenance
A consumer derma stamp commonly costs about $10-$50 internationally, while local prices may vary substantially by country, seller, import duties, and device construction. Price does not establish needle quality or clinical effectiveness.
| Item | Typical price range | Replacement or use interval |
|---|---|---|
| Fixed-depth derma stamp | $10-$30 | Replace when damaged or per label |
| Adjustable stamp | $20-$60 | Inspect every session |
| 70% isopropyl alcohol | $3-$10 | Replace when contaminated |
| Sterile gauze | $3-$8 per pack | Single use |
| Dermatology consultation | $75-$250 typical private range | As clinically needed |
| Professional microneedling | $150-$500 per session | Clinic-specific schedule |
A three-month replacement rule is only a rough consumer guideline. The device should be replaced sooner after approximately 10-12 sessions if needles dull, bend, corrode, or become difficult to disinfect. Reusing a damaged head increases trauma and reduces consistency.
What Alternatives Address Hair Loss?
For pattern hair loss, diagnosis-directed treatments such as topical minoxidil, oral medications prescribed by a clinician, low-level light therapy, or hair transplantation may have more relevant evidence than stamping alone. Hair electrolysis is different: licensed electrologists use electrical energy to destroy individual hair follicles for permanent hair removal, so electrolysis is not a treatment for scalp regrowth.
| Option | Primary purpose | Typical candidate | Main limitation |
|---|---|---|---|
| Minoxidil | Stimulate or maintain growth in selected disorders | Pattern hair loss | Requires ongoing use |
| Finasteride or similar prescription | Reduce androgen-driven miniaturization | Selected adults under medical care | Prescription risks and contraindications |
| Low-level light therapy | Adjunctive stimulation | Some pattern-loss patients | Device cost and variable response |
| Hair transplantation | Relocate viable follicles | Stable donor supply | Surgery and expense |
| Hair electrolysis | Permanent removal of individual hairs | Unwanted hair | Does not regrow scalp hair |
| Scalp camouflage | Conceal visible thinning | Temporary cosmetic coverage | No biological regrowth |
Electrolysis may be appropriate for unwanted facial or body hair, including a few stray hairs around a hairline, but using it across a thinning scalp would destroy follicles rather than preserve them. That distinction prevents a common category error when comparing “hair-growth” and “hair-removal” technologies.
Frequently Asked Questions
Can a derma stamp regrow a receding hairline?
A derma stamp may support a treatment plan for androgenetic alopecia, but evidence does not establish reliable regrowth of a fully bald or scarred hairline. Receding temples should be assessed before stamping because pattern loss, traction alopecia, alopecia areata, and frontal fibrosing alopecia require different management.
Should you stamp before or after washing your hair?
Wash the scalp first and stamp only after it has dried completely. Washing afterward can cause extra stinging and may not remove contamination introduced during treatment, while stamping over styling products or scalp oil increases irritation and makes clean needle contact less reliable.
Can you use a derma stamp on a bald scalp?
A smooth, intact scalp can be treated only after the cause of hair loss is understood and the skin has no rash, infection, open wound, or suspicious lesion. A derma stamp cannot regenerate follicles destroyed by scarring, and a completely bald area may have limited potential even when non-scarring loss is present.
Is scalp redness after stamping normal?
Mild, uniform pinkness that improves within 12-48 hours can be a typical response to shallow needling. Redness that spreads, becomes hot or painful, produces pus, or lasts beyond several days is not a normal recovery pattern and warrants medical advice.
Can women use a derma stamp for hair growth?
Women can develop pattern hair loss and may be considered for microneedling under a clinician-guided plan, but pregnancy, breastfeeding, hormonal disorders, iron deficiency, thyroid disease, and traction should be considered first. The same sanitation, depth, spacing, and minoxidil precautions apply.
How long should you wait between stamping sessions?
Wait at least seven days when beginning with a 0.5 mm device, and wait longer if tenderness, redness, burning, or scaling remains. Deeper professional treatments may require several weeks between sessions, so a home schedule should not copy a clinic protocol without supervision.
The Bottom Line
To use a derma stamp for hair growth, wash and dry the scalp, disinfect the device according to its instructions, divide the thinning area, press vertically with light pressure, avoid deliberate bleeding, clean the stamp again, and wait about 24 hours before applying minoxidil. Use a conservative 0.25-0.5 mm depth and no more than weekly at first.
Microneedling may help selected people with pattern hair loss when combined with an appropriate treatment plan, but it is not a universal cure and cannot restore follicles destroyed by scarring. Stop for infection, significant bleeding, or worsening inflammation, and obtain a dermatologic diagnosis when hair loss is sudden, patchy, painful, or rapidly progressive.
Sources
- Dhurat R, Sukesh M, Avhad G, Dandale A, Pal A, Pund P. “A randomized evaluator blinded study of effect of microneedling in androgenetic alopecia.” International Journal of Trichology, 2013. https://pmc.ncbi.nlm.nih.gov/articles/PMC3746236/
- American Academy of Dermatology Association. “Hair loss: Diagnosis and treatment.” https://www.aad.org/public/diseases/hair-loss/treatment/diagnosis-treat
- American Academy of Dermatology Association. “Hair loss: Who gets and causes.” https://www.aad.org/public/diseases/hair-loss/causes
- U.S. Food and Drug Administration. “Microneedling devices.” https://www.fda.gov/consumers/consumer-updates/microneedling-devices
- National Center for Biotechnology Information. “Microneedling for the treatment of hair loss.” PubMed literature database. https://pubmed.ncbi.nlm.nih.gov/?term=microneedling+hair+loss+systematic+review
- U.S. Food and Drug Administration. “Electrolysis hair removal devices.” https://www.fda.gov/consumers/consumer-updates/removing-hair-safely
- American Academy of Dermatology Association. “Hair loss: Tips for managing.” https://www.aad.org/public/diseases/hair-loss/treatment/tips
- World Health Organization. “Guide to local production: WHO-recommended handrub formulations.” https://www.who.int/publications/i/item/9789241548922


